Categories
Lawn & Garden

Keep Your Garden Healthy: Tips for Natural Ways to Prevent Pests and Common Plant Diseases

After spending hours tilling and planting the garden, the last thing you want is for all of your plants to become pest infested and/or covered in fungus or powdery mildew. Applying pesticides will add harmful chemicals to your crops, the soil and future plantings as well as effect the flavor of your fruits and vegetables. There are a range of safe and natural things you can do to keep your current and future garden healthy.

Start With the Soil

The soil is the first place to begin controlling disease and insects in an organic garden. Using soil that is full of organic nutrients and matter will help your plants thrive and produce a healthy, productive crop. Insects and diseases thrive off of injured and weak plants, but when they are strong and healthy, garden plants have an ability to change their chemistry naturally in order to defend against its enemies. Things you can do to strengthen the soil include:

  • Adding compost materials to the soil before planting. Items such as egg shells will provide natural nutrients to the soil.
  • Always mulch the surface of the garden to help suppress weeds, protect soil erosion, increase earthworm activity and prevent slugs and snails from taking over. Leaves, straw, pine needles and grass clippings make excellent mulch for a garden.

Prevent Fungus 

The best way to fight fungus in the garden is by using natural items you probably already have in the kitchen. These simple remedies will help to safely and naturally keep out common problems, such as fungus and disease.

  • Apple cider vinegar is excellent for treating a range of plant diseases, such as black spots and powdery mildew. In a spray bottle, mix 3 tablespoons of apple cider vinegar with 2 quarts of water. Spray the infected plants with the solution when the temperatures are the coolest, such as in the morning or early evening. Avoid spraying the plants when there is direct sunlight on them and repeat daily until the condition is cured.
  • Milk is an ideal virus and fungus fighter for the garden. To prevent fungus, simply sprinkle a few tablespoons of powdered milk in the soil before planting. If you notice fungus on the leaves of plants, spray a mixture of equal parts of milk and water (1-cup milk and 1-cup water) directly on the infected leaves.
  • Baking soda is an excellent treatment for plant fungus. In a spray bottle, mix 1 tablespoon vegetable oil, a few drops of liquid, biodegradable dish-washing liquid and 1 tablespoon of baking soda. Spray the infected plants, including the base of the plant and the underside of leaves.

To help keep your garden healthy year after year, it is important to rotate the crops. Avoid overwatering plants, especially if you are noticing fungus or mildew. An excellent way to improve the health of your garden as well as try new garden foods, is with companion planting. Companion planting simply means arranging plants that are beneficial for each other. For example, planting a strong smelling herb near the vegetables will prevent insects from smelling the vegetable plants.

~Rene W.
Categories
Eco Tips Lawn & Garden

Growing, Using, and Preserving Fresh Herbs

When a recipe calls for dill, oregano, or basil, many cooks reach for a jar of commercially prepared, dried herbs in the pantry. However, to have the freshest, most delicious flavors, experienced cooks know that there is no substitute for fresh herbs. However, most home cooks use a wide variety of herbs, and buying them all from the supermarket could get expensive very quickly. One solution to fresh herb flavor without the expense is to grow your own herbs at home.

Growing Herbs

Thankfully, most herbs are simple to grow at home. A sunny spot and some average soil are all that are needed, along with a little effort. Basil, oregano, dill, parsley, cilantro, and mint are among the simplest herbs to grow. Start small the very first year so that you will not get overwhelmed.

Many herbs grow well from seeds, and this is an inexpensive way to get started. Basil, parsley, thyme, cilantro, and dill are good candidates for starting from seeds. However, perennial herbs like rosemary, chives, and fennel are slower growing. You will probably be happier with them if you buy them in small pots, already started.

Plant your herbs in a well-drained spot that gets six to eight hours of sunlight daily. Water them when the ground gets dry and pull weeds that pop up. Pay attention to the tags that come with the plants and space them appropriately.

Harvesting Herbs

When your herbs have established themselves, you can start snipping bits of the foliage for recipes. The peak of flavor is achieved right before the plants flower. You can prolong this period by snipping off the flower buds before they open. Never harvest more than one-third of the plant at once to avoid weakening the plant. Harvest the leaves from the outermost part of the plant, allowing the inner leaves to grow.

Storing and Preserving Herbs

If you have plenty of a particular herb, you can store the stems for about a week in a glass jar full of water in the refrigerator. Loosely cover the jar with a plastic bag to keep them fresh. Alternately, you can freeze fresh herbs and store them in zip-top baggies in the freezer. They will still be useful for flavoring but won’t be very good for garnishing. Last, herbs can be dried in a dehydrator or an oven on low heat. After drying, crumble the herbs and store them in jars with tightly-fitting lids.

~April F.

Categories
Featured Lawn & Garden

How to Make Soda Bottle Greenhouses

After you have grown your own veggies for a few years, you may be tempted to start your own seedlings. After all, a packet of vegetable seeds is much less expensive than a six-pack of vegetable seedlings, and you will get 25 or 30 seeds in each packet. Starting seedlings in peat pellets on a windowsill is fairly easy. However, if you don’t have a grow light, your seedlings will quickly become leggy. Most windowsills just do not have enough sunlight for a growing seedling, but the seedlings may not be quite ready for the outdoors. The weather of early spring can be notoriously fickle, and seedlings can freeze on an unexpectedly cold night or become damaged by an unexpected hailstorm.

Soda bottle greenhouses can help your seedlings grow tall and strong by allowing them to be outdoors with plentiful sunlight. However, they also provide protection from unexpected cold snaps and harsh spring storms. Additionally, they are an eco-friendly way of reusing trash that would end up in a landfill.

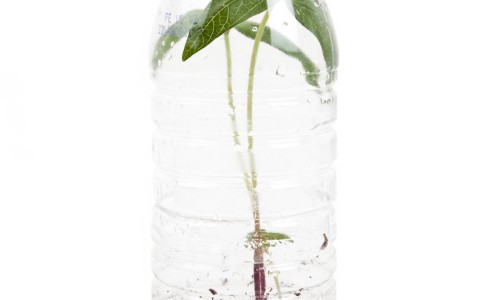
To make soda bottle greenhouses, you will need one empty soda bottle for each seedling, a craft knife, and potting soil. You can start your seedlings in peat pellets on your windowsill. Alternately, you can directly plant the seeds in the soda bottle greenhouse.

To make the greenhouse, first remove the label from the soda bottle and rinse any soda residue from the inside of the bottle. This sticky juice could attract ants; the ants will not damage your plants but will definitely be annoying.

Using the craft knife, pierce the bottom of the soda bottle to create a small drainage hole. Next, about halfway up the bottle, cut around the circumference of the bottle. Do not cut all the way around. You probably just need to cut about 85 percent of the way around the soda bottle. You can then fold back the top half of the bottle.

Fill the bottom half of the bottle with high-quality potting soil. Dampen the soil by pouring water into the dirt until it comes out of the drainage hole at the bottom of the bottle. Next, plant your seedling or seeds in the dirt.

Carefully move the top of the bottle back over the top of the seedling. Do not allow the plant’s leaves to become pinched in the plastic. Set your soda bottles outdoors in a sunny area. The soda bottle will protect the plant from cold weather and bad storms. You can leave the top of the bottle on if cold weather is an issue. However, if it gets hot, you will want to remove the lid to allow for ventilation and airflow. When the garden spot is ready and the last frost date for your area has passed, cut away the top of the soda bottle and plant your seedlings in the garden.

~April F.

Categories
Eco Eats

Which Fruits and Veggies Should Be Organic?

Some people have read reports about harmful chemical residues in their foods and worry that they will make their kids sick by feeding them fresh produce. These families may not be able to afford to only buy organic produce. Yet, these parents also know that a diet rich in fresh fruits and veggies is crucial for the health of the whole family. Some parents may feel that they are in a no-win situation when planning the family’s meals and snacks.

However, if you are in this position, there is good news. You can prioritize your spending and still feed your family well. Certain types of fruits and vegetables are more likely to be contaminated with harmful chemicals. These varieties should always be bought from an organic farm. However, other types of fruits and veggies are less likely to be contaminated. Those types can be bought from your traditional supermarket produce department.

Every year for the past few years, the Environmental Working Group has released a list of foods that are most likely to be contaminated by harmful residues. They called these foods “The Dirty Dozen.” Here are the foods that are most dangerous due to elevated pesticide levels. You should buy these foods organically if at all possible.

  1. Apples–The old saying, “An apple a day keeps the doctor away.” may not apply to conventionally grown apples. The health benefits of this flavonoid-loaded fruit may be outweighed by the poisons that conventional growers must spray to keep bugs at bay.
  2. Celery–Celery is one of the worst offenders for pesticides. Never buy conventionally grown celery because the pesticide residues are sky-high.
  3. Bell Peppers–Red and green bell peppers are loaded with antioxidants and Vitamin C. Thankfully, they are easily grown at home in a garden or on a patio in pots if you can’t afford organic peppers.
  4. Peaches and Nectarines–Because of their thin skins and abundant insect pests, peaches and nectarines are very likely to have residues. Even frozen and canned peaches can be contaminated, so buy organic.
  5. Strawberries–These soft berries are prone to fungal infections, so commercial growers typically use fungicides on them. Organic varieties may be a bit smaller, but they often have higher levels of antioxidants and greater flavor.
  6. Grapes–Grapes and raisins are sources of resveratrol, an antioxidant that repairs cell damage. However, choose organic versions to avoid pesticide exposure.
  7. Spinach, Lettuce, Kale–Leafy greens are a great source of iron, Vitamin K, Vitamin C, and a host of other crucial vitamins and minerals. Buy organic types to get all of the benefits without the poisons of pesticides.
  8. Cucumbers–Organic cucumbers can provide a cooling burst of sweetness on a hot day and provide plenty of Vitamin K.
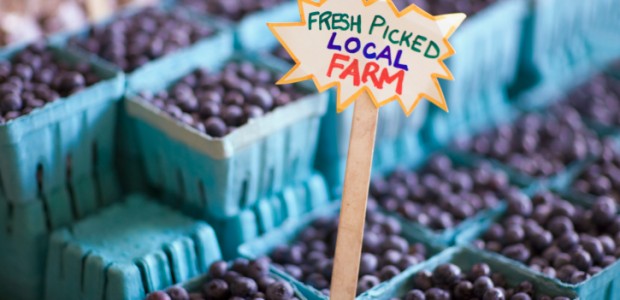
  9. Blueberries–Blueberries have one of the highest levels of cancer-fighting antioxidants of 60 tested varieties of fruits and veggies. Commercial growers typically spray their berries with pesticides, so get your antioxidants safely by buying wild-grown berries.
  10. Potatoes–Most of the nutrients found in a potato are in the skin and the thin layer of flesh directly beneath the skin. Choose organic varieties to ensure no harmful pesticides in this root vegetable.
  11. Green Beans–Green beans are great sources of Vitamin C and flavonoids. They are frequently sprayed in commercial fields with pesticides, so organic is a must for this popular veggie.
  12. Cherry Tomatoes–What would a salad be without a few cherry tomatoes? This popular vegetable is loaded with lycopene and can improve prostate health. Choose organic for the most health benefits.

~April F.

Categories
Eco Tips Home Design

Eliminate Fossil Fuels, Electric Bills and Natural Gas Bills With Solar

While the pressure to find alternatives to fossil fuels has eased due to somewhat lower gas prices and the media attention has shifted away from the ecology again, that doesn’t mean these issues have gone away. In fact, based on past behaviors, these issues will come to a peak yet again sometime in the future. However, one way you can know you’re doing your part for the ecology, plus saving yourself a lot of money in the process, is to switch everything you have to solar power.

You may wonder how this is possible. With today’s technology, not only is solar power more affordable and efficient than ever, but by replacing or supplanting what you currently have with electric equivalents, you can actually accomplish this. Here’s how:

  • After installing a solar system, replace appliances that use natural gas with electric ones. This includes hot water heaters, stoves, ranges and ovens.
  • Replace your heating system that may use natural gas, kerosene or fuel oil with an electric one.
  • If possible, replace your vehicles with EV (electric vehicle) equivalents. Today, not only can you find small vehicles that are EVs, but SUVs and performance vehicles as well.

Granted, the initial investment in solar isn’t cheap and replacing your existing natural gas appliances and gasoline powered vehicles isn’t an inexpensive prospect, there are lots of compensations. First and foremost, you’ll receive tax breaks from the Federal government and many state governments also provide tax breaks as well.

Also, since you’ll have eliminated electric bills, natural gas bills and gasoline expenses, those funds can be applied to defraying the costs of the solar build. What most people don’t realize is that going solar can actually be subsidized by the electric companies as well. That’s because excess electricity generated by your solar system can be “sent” through the existing power grid and redistributed by the electric companies. This means you can actually accrue credits or even be paid by the electric companies for your excess electricity.

Determining your actual ROI (Return On Investment) can be somewhat challenging. Most solar ROI calculators are limited, but can give you a general idea of your break even points. By replacing fossil fuel factors, this number can drop dramatically which means you could actually be making money from your solar system in just a few years. Not only can you save money and reduce your carbon footprint with solar, you could actually make money in the process!

~Brian C.

Categories
Eco Tips Featured Gadgets & Gear

Tips to Help Keep Your Reusable Bags Clean

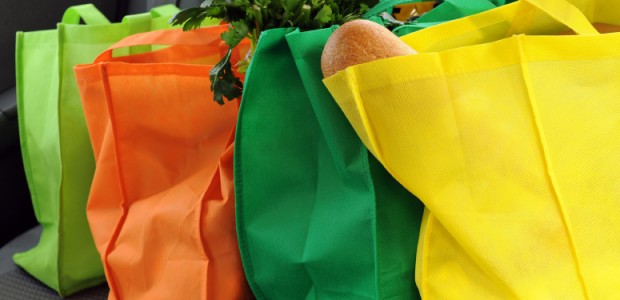
Reusable shopping bags are a great way to be eco-friendly and stop yourself from using plastic bags. I not only use them at the grocery but also when I’m out clothes shopping, sometimes when I need a gym bag in a pinch, or even to run errands. I was recently told how dangerous it was to use the reusable bags without a washing in-between. When I thought about it I realized I don’t think I have ever washed my reusable bags! However I’m sure I’m not alone. A quick study was done of patrons in a grocery store and 97 percent of shoppers admit that they have never washed their reusable bags!

A recent study funded by the American Chemistry Council found that nearly every reusable bag examined for bacteria contained bugs, coliform bacteria (suggesting raw-meat or uncooked-food contamination), mold, yeast or E. coli. The study didn’t specify what strands of E. coli were found (many of which are harmless).

If you take a moment to really think about it, people are putting meats, unwashed foods and all sorts of items in these bags. Logic would tell you these bags could get unsanitary pretty quickly, however don’t just toss your bags just yet.

Some simple tips to help keep your reusable bags clean and sanitary:

  • Reusable bags should be washed after every use when carrying food just as you would clean a kitchen towel
  • Use more than one bag and label them “Meat, Dairy, Produce,” etc.
  • Don’t leave any unwashed bags in your car, the heat can help bacteria grow

How to Wash Reusable Bags

Some bags have labels with instructions on how to launder. For those that do not, if the bag is a woven canvas bag launder in hot water with your usual detergent. These can be line dried or tossed in the dryer.  Plastic-lined reusable bags should be scrubbed using hot water and soap and air-dried.

Make sure that both the cloth and plastic-lined reusable bags are completely dry before storing them.

Categories
Recycling

6 Simple Ways to Get Kids to Recycle

With Earth Day quickly approaching it’s important to start to teach kids how to recycle, now. It normally takes about 21 days to form a new habit, which will leave a little wiggle room in time for Earth Day. Recycling is one of the easiest ways to help reduce your impact on the Earth. It is so important teach children about recycling at an early age so they will develop lifelong habits. Here are some easy tips and tricks to get your children excited to recycle!

Craft Time! Save a large storage box and fill it with old scraps of paper, milk cartons, left over ribbon, etc. Once a month have a craft afternoon and let your children’s creativity take over! You are going to be surprised with what creative and crazy ideas they come up with!

Decorate! Have your children decorate your recycling bins. When the children have a sense of ownership, they will be more inclined to take recycling more serious than before! Also you now have a one of a kind piece of yard artwork, that is sure to brighten up the curb! (If you have a city issued recycling bin be sure to check with your local officials to make sure it’s okay.)

Compost! Create a compost bin with your children. Creating a compost bin will help your children learn the difference between what is biodegradable and what is not. You can also use your compost to start a vegetable garden! Click here for tips on creating a simple compost!

Sing Along! When we were children we were taught life lessons through songs and recycling is not any different! Find a recycling tune and sing it when taking the recycling to the curb. We are a fan of Jack Johnson’s Three R’s (Reduce, Reuse, Recycle) from the Curious George’s soundtrack.  Check out the song here.

Sell! Have a garage sale. Make sure to explain the reasoning behind having a garage sale to the children. Be sure to explain that you do not just throw away things. Have your children choose a couple of toys to sell at the garage sale and let them keep the profit.

Donate! After your garage sale or after cleaning out your closets, be sure to donate all unwanted items to your local Goodwill or Salvation Army. Don’t forget to bring the kids along to drop off the donated items. Make sure to stress to them that nothing will be thrown away and every item will have a place to go.

Categories
Articles By Topic Eco Tips Featured

Best of the Best: Green Laundry Detergent

With so many “green” laundry detergents out on the market, how do you know which is the best for the environment and which is the one that is the best for your family? The Environmental Protection Agency (EPA) has created a system that allows consumers to find out which laundry detergents live up to their claims. The EPA asks the manufacturers to submit a list of all the active ingredients and if they are using the safest chemicals they will earn the seal of approval (the Design for the Environment Seal to be more specific.)

Even when you know which chemicals are harmful, the manufacturers don’t have to list them. That’s where the Design for the Environment logo becomes extremely helpful. You know that you’re buying the best eco-friendly product. However when you are picking out laundry detergent and the product does not have the seal, be sure to check the label for some of these worrisome ingredients/chemicals:

  • Phosphates– especially nonylphenol ethoxylates
  • Chlorine
  • Petroleum

According to consumersearch.com these are 3 of the best laundry detergents you can buy to help keep your family and yourself safe and help the environment out as well!

iStock_000021578870XSmall

  • Seventh Generation Natural Powdered Detergent (*Est. 36 cents per load). Currently Seventh Generation is waiting for the Design for Environment Seal; however the consumer reviews are very positive.  You can order online at their website here.
  • Mrs. Meyer’s Clean Day (*Est. 24 cents per load).  Mrs. Meyer’s Clean day has attained the Design for the Environment Seal and also has a strong fan base.  Consumers that have reviewed the product have mentioned that the variety of scents is not too overpowering and the detergent does what it claims. Go here for more information or to purchase the detergent.
  • Arm & Hammer Essentials Liquid Laundry Detergent (*Est. 37 cents per load). Good housekeeping has ranked this #1 among 9 detergents tested for effectiveness.  Currently this product is only sold as a liquid and does not have the Design for the Environment seal. Click here to read reviews and purchase this product.

Not ready to make the switch just yet? For consumers unwilling to make the switch to green laundry detergent just yet, try purchasing eco-friendly laundry products and avoid buying fragranced products. That may help eliminate some of the worst chemicals in your laundry detergent (from a health perspective).

Sources: consumersearch.com

Categories
Articles Featured Furnishings

What You Should Know About Green Carpeting

At first glance, eco-friendly carpet may seem too good to be true, saving the Earth and having an eco-friendly home, but it isn’t! Eco-friendly carpeting is a great way to help green your home.

Firstly it is very important to understand the differences between green carpets that are currently on the market. Some carpets are made from post-consumer recycled materials, such as plastic water bottles and soda bottles. This is a good choice because it helps keep those materials out of landfills and it allows the carpeting to be recycled at a much later date. It uses less Volatile Organic Compounds or VOCs, leading to a healthier, happier home.

Another option is natural carpets that are made from natural materials. These materials range from wool, seagrass or bamboo. These materials come from resources around the world. On average they have less toxins, are durable, however their prices can be high.

The Pros of Green Carpeting

  • Recycled carpeting helps the environment by keeping waste out of landfills
  • Later on if you choose to replace your recycled carpeting, it can be further recycled unlike traditional carpeting
  • There are fewer VOCs with recycled carpeting, leading to improved air quality in your home and less risk for respiratory problems
  • Natural carpets have lowered in price and due to popularity there are more options to work with
  • Natural carpets are durable and highly stain resistant

The Cons of Green Carpeting

  • Not all recycled carpeting is made with 100% recyclable materials
  • Depending on your location it may be harder to find recyclable carpeting
  • On average natural and recycled carpeting costs more than traditional carpeting since natural carpeting is dependent on its sources and recycled carpeting is a little harder to produce

There are many pros and cons to choosing green carpeting, although most people agree that eco-friendly carpet for the home is the better choice. You will still have to consider your budget and personal preferences when deciding.

Sources: Greenfloors.com (http://www.greenfloors.com/), hgtvremodels.com, (http://www.hgtvremodels.com/interiors/the-benefits-of-recycled-carpet-tiles/index.html)

Categories
Eco Eats Eco Tips Featured

Mushroom and Asparagus Fettuccine for Meatless Monday

Looking for a simple and easy dinner recipe? We have found the perfect meatless Monday recipe for you! This recipe will take you about 25 minutes to make and it tastes delicious. Pair with a simple garden salad and a glass of wine!

Mushroom and Asparagus Fettuccine

Ingredients

8 ounces dried fettuccine or linguine (or your favorite pasta)

8 ounces asparagus, trimmed and cut into 1-1/2-inch pieces

3 cups sliced fresh mushrooms

1/2 cup chopped onion

3 cloves garlic, minced

1 tablespoon olive oil

1/3 cup mushroom broth or vegetable broth

1/4 cup half-and-half or light cream

1/4 teaspoon salt

1/8 teaspoon black pepper

1 cup chopped plum tomatoes

1 tablespoon finely shredded fresh basil

1 tablespoon finely shredded fresh oregano

1/4 cup pine nuts, toasted

Optional Ingredients

Finely shredded Parmesan cheese (optional)

Directions

Cook fettuccine or linguine according to package directions, adding asparagus the last 1 to 2 minutes of cooking; drain. Return pasta mixture to saucepan; cover and keep warm.

Meanwhile, in a large skillet cook mushrooms, onion, and garlic in hot oil over medium-high heat for 4 to 5 minutes or until most of the liquid is evaporated. Stir in broth, half-and-half, salt, and black pepper. Bring to boiling. Boil gently, uncovered, for 4 to 5 minutes or until mixture is slightly thickened. Stir in tomatoes, basil, and oregano; heat through.

Spoon the mushroom mixture over pasta mixture; toss gently to coat. Divide among 4 bowls or dinner plates. Sprinkle with pine nuts and, if desired, Parmesan cheese. Serve immediately.