Categories
Eco Tips Green Building Recycling

Five Fun Ways To Introduce Recycling To Kids

So you’ve come a long way into educating yourself about recycling. Suddenly, you get the feeling that it is time to discuss this topic with your children. Recycling is a matter of raising awareness about the impact we have on the world we inhabit. If our goal is to create sustainable change, then change has to be transmitted to next generations. Thankfully for us, kids are more than willing to learn about planet earth and how to take care of it. So it is just a matter of finding the right approach. Let’s discuss some ideas.

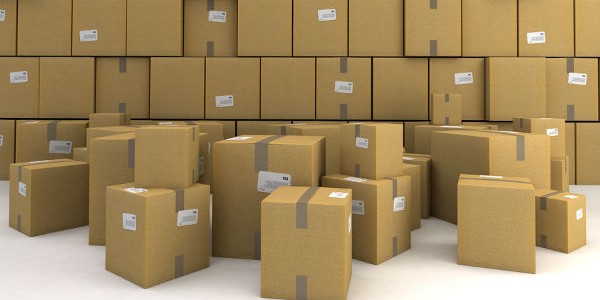
Arrange a Field Trip
Even though it may require a little planning, a field trip to a recycling facility is a great way for kids to become acquaintance with the whole idea.  Besides, meeting professionals and workers at a recycle center will certainly boost their interest in the topic. Remember that kids of all ages are interested on seeing and experiencing things for themselves, so a “hands-on” experience will always work wonders with them.

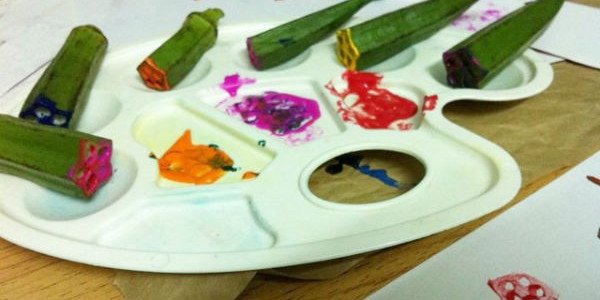
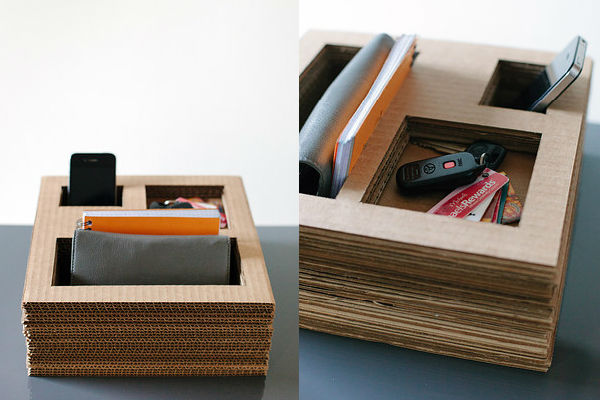
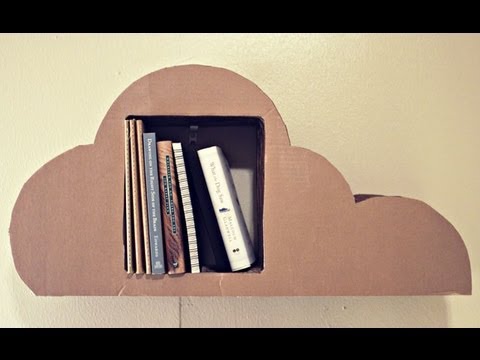
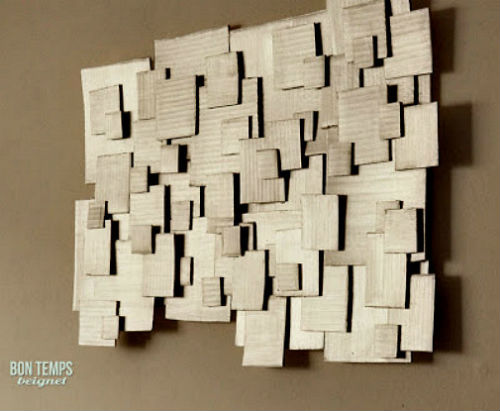
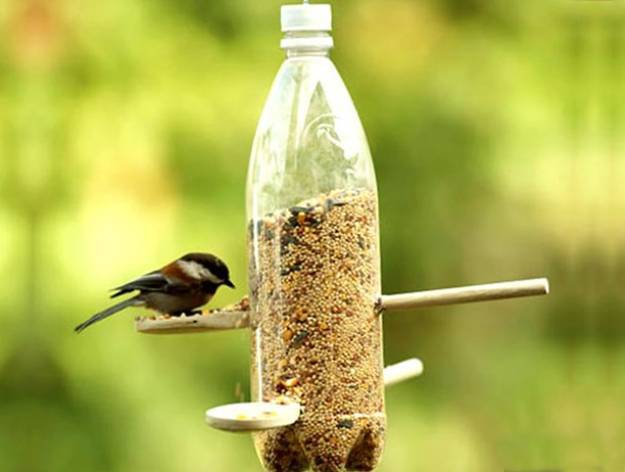
Start your own recycling project with them
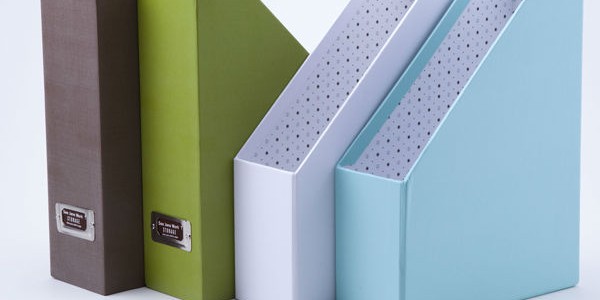
Another great “hands-on” experience for the children is to start a recycling project at home. So why not taking a weekend off to spend some quality time doing something incredibly gratifying like recycling paper with them. There are plenty of tutorials over the internet to draw ideas from. I assure you that kids will love the idea of creating something new out of old waste paper.

lighbulb-green-eco-thinking-guy-pic

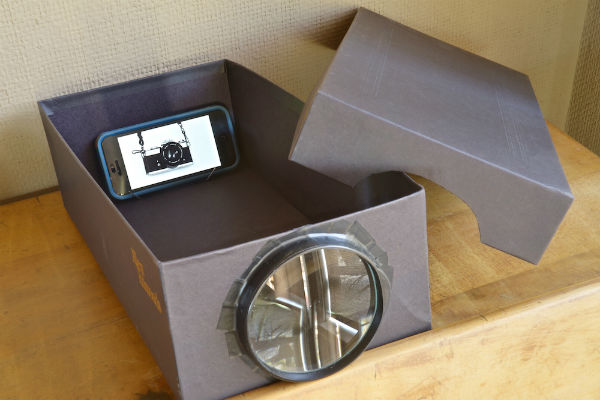
Invent recycling games
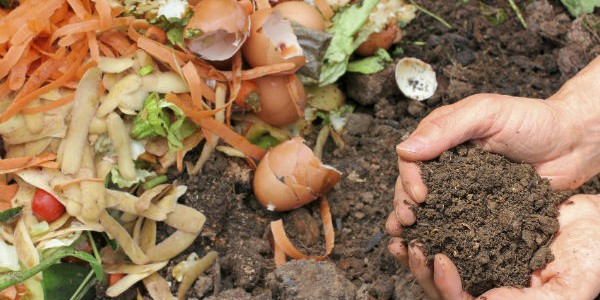
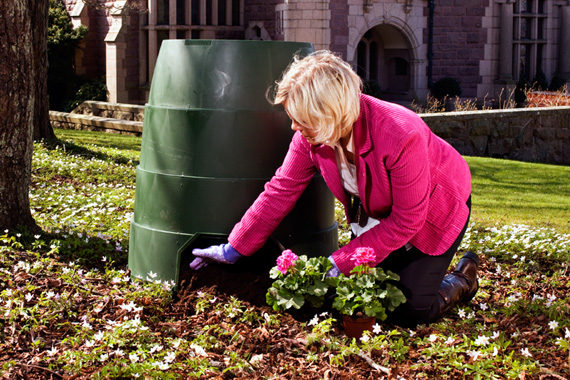
Set up some games to educate your kids on recycling issues. Get creative and remember to focus on the experience. Allow them to be the recycling experts for a day or turn them into the ultimate recycling superheroes. Some ideas for you to experience with are to create games related to sorting garbage items, making organic composts and dumping the right kind of waste on the right kind of bin. And always give away prizes, and treats!

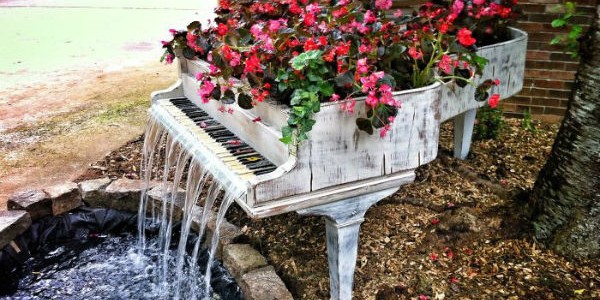
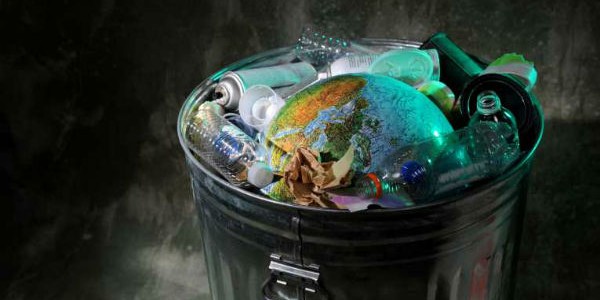
Discuss with your children on how waste affects nature
Be honest with them about the current environmental situation. Talk to them about the changes our planet is going through and our responsibility as humans in reverting this process. Educate them about contamination and how human waste has a profound effect on planet earth. Help them realize how recycling can lead to positive environmental changes.

Empower them
Information is power. Education is power. Awareness is power. Do not underestimate your children’s potential to become change agents. Empower them to take active part in every possible way they can. They’ll be more than willing to do so.

Recycling can be fun and games but it can also be a powerful transformation tool in our homes, our schools and communities. Don’t be afraid to raise awareness. As Gandhi once said: “Be the change you want to see in the world”. Encourage your kids to live under the same principle and keep change going!

Categories
Home Decor Recycling

Quick DIY Projects For Your Home

Instead of buying more and more decorations (and in turn piling up trash on our landfills), it’s always satisfying to make your own little projects to pretty up your home. If you are using recycled or organic materials, all the better! If you really want to give DIY a go but feel like you don’t have the time, give these 5 minute projects a go.

From burlap to art

If you have some burlap laying around, you can pretty easily turn it into a chic art piece that will give your home a boho touch. You will need a piece of burlap, a stencil, craft paint and some sponges. Oh, and a frame to display it too. If you don’t want to buy anything, you can make your own stencil out of cardboard too. Place the stencil on the burlap and use the sponges to dab paint in bright colors through the shapes. Carefully retire the stencil and leave the piece to dry. Frame it and display on your favorite corner of the house.

shoebox-projector-DIY-iPhone-smartphone
Quick DIY Projects For Your Home

Shoebox projector

Nowadays there are some really fancy iPhone projectors out there. Electronic waste is a problem, though and how often are you going to use that projector? If you really need one right now, you can make your own for one dollar. Get a shoebox with a lid, a paperclip, duct tape (black) and a magnifying glass that you can get for one buck at the dollar store. If the inside of your box is not black, you might want to spray paint it or tape some black paper. Trace the edge of the magnifying glass (without the handle) on one of the short sides of the box and carefully cut it out. Line up the lens with the hole and tape it, covering the entire edge with duct ape, so no light leaks around it. Now bend the paperclip into a phone stand (or use a cheap stand you already have) and place the phone all the way to the back of the box, turn it on and admire the projection on the wall. To find focus, slowly walk forwards or backwards until you see a clear picture. Fine tune the focus by moving the phone closer to the lens if you want. Now sit back, relax and enjoy your photos and videos.

Flower stamps out of okra

If you have some okra handy, you can quickly turn it into a flower stamp. By quickly I mean “in seconds”. Simply cut it in half to reveal the hidden flower within. Turns out that it has a surprisingly flower-like pattern and just the right texture to leave a clear image in paper or fabric. Dip your okra in ink, fabric paint or any other pigment and press down to see pretty flowers in your next project.

Categories
Lawn & Garden Recycling

Recycle Your Furniture For Your Dream Garden

Looking for a way to revitalize your garden? Try furniture. And I don’t mean your typical patio chairs and plastic table. Oh no! Instead of throwing away old furniture (or sell it for 89 cents at your next garage sale which is hardly a deal), recycle it and give it new life in your garden!

Categories
Recycling

How To Reuse Your Coffee Grounds And Tea Leaves

If you are anything like most Americans, chances are your day doesn’t start until you’ve had your first cup of coffee. And you’ll have a couple more cups throughout the day. And maybe a cup of tea or two as well. That’s a lot of coffee grounds and tea leaves you shouldn’t be throwing away. But did you know you could have been reusing them in your home and garden all this time? Neither did we! (Keep reading.)

Categories
Home Improvement Recycling

Recently Moved? Upcycle Your Cardboard Boxes!

What is “upcycling”? It’s when you use discarded materials to create something new. Something useful, beautiful and with much more value than it originally had. For example, instead of throwing out or recycling cardboard boxes, your can upcycle them to create these great items.

desktop-organizer-cardboard-upcycle

Desktop organizer – If you are normally dealing with a lot of clutter in your desk and don’t know what to do about it, then this project is for you if you have a lot of leftover cardboard from the move, use them to cut around 20 square sheets (or any shape, as long as they are identical). Leave one to serve as a base and then cut slots in different sizes on the rest, to hold your items. The idea is to have around 5-10 sheets with the same slots (depending on the depth you need) and then simply stack them all and clue them together. You can later paint the whole ensemble or add details to make it match the rest of your desk. Now you have a single place to keep your little notepads, your keys, spare change and your cellphone.

cardboard-box-bookcase-DIY

Bookcase – This process is similar to the one used for the desktop organizer. You simply pick a shape that works for what you have in mind and cut several sheets of cardboard with that same shape. Carve out some slots of the desired size and make sure your books and notepads will fit. Now hang it on the wall and enjoy your new stylish and environmentally friendly bookcase.

cardboard-box-modern-art-wall

Modern wall art – This is a fun project that anyone can manage, no matter their artistic ability. Get all your cardboard scarps and cut them into small squares and rectangles of different sizes. Now place them together in a geometric composition. Don’t be afraid to make them overlap to get an interesting sense of depth. Once you are satisfied with the look of your piece, carefully glue them all together and finish with a coat or two of metallic paint. Glue the whole set to a support to be able to hang it from the wall and decorate your favorite room with it.

DIY-upcycle-cardboard-lantern

Geometric lamp – Cut out a cardboard frame for these lanterns, glue it together and coat it with your favorite color of spray paint. Then, use a colored tissue paper to cover the panels of the lamp, gluing it on the inside of the frame. Use cardboard for the top panel of the lamp, painted in the same color as the rest of the frame. Cut out a small slot to hang a string of twine. Tape the twine to the back of a battery-operated LED light and hang it on the inside of your lamp. Now you can enjoy a beautiful light fixture that people won’t believe you made yourself.

Categories
Articles Eco Tips Recycling

Five Green Sins We Are All Guilty Of (And How To Avoid Them)

If you are reading this, you probably care about the environment. But even if you do make an effort to reduce your carbon footprint and live a green life, you are human and there are some not-so-green habits that are hard to change. Instead of feeling guilty, follow these tips to stop repeating the same green sins.

eco-light-bulb-grass-green

1. “Bottled water is so convenient!”

We all know plastic bottles are bad. They use a lot of energy when created, they fill up landfills, they take forever to break down… Plastic bottles are bad. And yet, the convenience of being able to buy a bottle of water whenever you are thirsty is hard to give up. The only way to change it is with a reusable bottle. Find one that is made out of stainless steel or BPA-free plastic. They come in many different sizes, so you can find one that fits your needs. And if you don’t like the hassle of cleaning, find one with a wide mouth, that will make clean up easier. Get in the habit of carrying your bottle around and using it instead of plastic cups.

2. “Energy-saving bulbs are so ugly”

Compact fluorescent bulbs save an incredible amount of energy. Trading some of your incandescent for fluorescent bulbs can prevent the emission of 400 pounds of greenhouse gases. That’s nothing to scoff at, and yet fluorescent light can be so depressing. The good news is that not all bulbs are created equal, so you just have to shop around to find the shape, size, color and brightness that works best for you.

3. “I know batteries are bad, but it’s so much easier to throw them out”

Recycling batteries is one of those things where we can’t compromise. They are incredibly dangerous and contaminate absolutely everything. And yet, some times we all end up hiding a couple of batteries at the bottom of our trash bags. That’s bad. The good news is that recycling batteries is getting easier by the hour. Just Google recycling places near you and you’ll see that you can take your used batteries to a lot of places, including your favorite grocery store, and they will do the recycling for you. And, of course, invest in rechargeable batteries. They are recyclable too and they last so much longer.

4. “I can never bring myself to carry around a market tote”

Plastic bags are so wasteful, and carrying a reusable cloth grocery bag will prevent a lot of waste. But it’s so hard to remember to bring it whenever you go to the market. The solution is to buy a couple of totes you like and keep them in your car. If you don’t drive, buy those totes that fold up into tiny pockets and keep them in your purse or regular backpack. You will always have them with you, and you will barely notice they are there.

Categories
Eco Tips Lawn & Garden Recycling

Composting 101: Start A Compost Pile At Home

Every house with a garden or a backyard should have its own compost pile. Why? Because organic materials make up 30 percent of what we throw away. If you compost them, we turn them into precious nutrients for your plants and vegetables. If you don’t, then they end up as trash and take up space in landfills, where they also release greenhouse gases.

woman-compost-pile-bin-garden

Basically, composting is an essential way to reduce your carbon footprint significantly. Not only does it reduce methane emissions from landfills, it also enriches your soil, to help your plants grow stronger. You will need to use less chemical fertilizers (or none at all), and, since it suppresses plant diseases and pests, you will use less pesticides as well. So why isn’t everyone composting yet?

It’s not difficult to start your own compost pile at home. You already have all the ingredients, you just have to create a new routine, instead of throwing them away, you add them to your compost pile. Compost has three basic ingredients: Browns, which include branches, twigs and dead leaves. Greens, which include vegetable waste, fruit scraps, coffee grounds and grass clippings. And water, that will help break down the other materials and turn them into compost.

The first step is to select a dry, shady spot for your pile or bin. If you don’t have space outside, you can use an indoor compost bin that you can find in any hardware store. Don’t worry, a properly-made compost pile will not smell nor attract pests. If you decide to do an outdoor pile, place it on bare ground, so worms and other organisms can enter your pile and help it along.

The second step is to add to the pile. Try to keep an equal ratio of green and brown ingredients, and make sure your pile is always damp. However, keep in mind that there are ingredients you should never compost, such as oils, meat products, milk, eggs, manure from meat-eating animals and plant clippings that have been treated with chemicals or diseased.

Once you have your compost pile going, you’ll want to keep it covered to retain moisture. You should also turn the material every too weeks at least, to help speed up the decomposing process. Use a pitchfork, a shovel or any tool you think will help, and mix and invert your pile. If you consider it seems a little bit dry, you can spray it a bit with a hose as you are turning it, to keep your pile moist. When the material at the bottom is dark and rich in color, with a texture similar to soil, then it will be ready to use. The time it takes depends on the size of your pile and the materials you add but it usually takes from a couple of weeks to months.

Categories
Articles Home Decor Recycling

8 Smart Ways To Organize Your Life With Magazine Holders

If you really want to have an eco-friendly house, then recycling is the way to go. But there are more ways to do that than separating glass from plastic when taking the trash out. Another big part of recycling is finding new life for common objects. Like magazine holders. Despite having an incredibly specific name, they can be used for more than just holding magazines. Organize your house (and your life), save space and impress your friends with your craftiness, all with the help of the humble magazine holder.

magazine-holder-make-up-organizing-DIY

1. Organize your make-up

With the help of a cute, decorative magazine holder, instantly get rid of the chaos that seems to follow your make-up wherever it goes.

magazine-holder-toilet-paper-DIY-bathroom2. Organize your toilet paper

This is the last time you will find yourself in the toilet without toilet paper. Your rolls will be dry and always at reach so you can finally do your business in peace. Your guests will silently thank you too, since they will avoid the awkward “there’s no toilet paper how do I ask the host” dance.

magazine-holder-corner-shelf-clutter-DIY3. Organize your clutter

Find a nice wooden magazine holder and secure it to the wall in an unused corner. Now you have a place to store all the tiny objects that clutter your desks and tables but somehow manage to get lost every time you need them.

magazine-holder-cling-wrap-kitchen-cabinet4. Organize your cling wrap

And your tin foil, wax paper, etc. Instead of letting those boxes occupy space in your drawers, store them in a magazine holder in the inside of a cabinet door. This will save you space and time.

magazine-holders-organize-mail-DIY

5. Organize your mail

Secure a magazine holder (or several) to your wall and file all your mail, bills, important and unimportant documents, and every other piece of paper that always ends up getting lost when you need it.

magazine-holders-potatoes-onions-kitchen6. Organize your produce

Keep your onions, potatoes and other non-refrigerated produce from rolling away with a couple of well-placed magazine holders. You will keep your counters and cabinet clean, and you will always know when you need to buy more produce.

magazine-holder-curling-irons-DIY

7. Organize your curling irons

Hair styling requires a whole lot of products and appliances (at least, if you are like me it does). Keep your hot irons safely stored, secured and organized with a decorative magazine holder. This will also prevent all the cords from tangling, which will prolong their lifespan and save you time in the mornings.

magazine-holder-cutting-boards-kitchen-cabinet

8. Organize your cutting boards

Secure a magazine holder to the inside of a kitchen cabinet and keep your cutting boards dry, organized and always at reach. This will help you save space in your kitchen, reduce all the clutter and make your cooking a lot easier.


Categories
Eco Tips Furnishings Home Decor Recycling

Turning Recyclable Items Into Fashionable Backyard Décor

bird-feeders-diy-recycled-craftsSave those bottles! Save those boxes! Save anything recyclable because it can totally be reused again but in a cute way. Decorate your backyard with new items from things that you would normally recycle. It can be so much fun. Plus who does not love decorating? You can involve the whole family and make it a cohesive fun project. First, you want to put everything in separate piles so that way you know what you are working with. Next, you want to go to the craft room and get all the supplies. Remember to get all the scraps from your craft room because they will be greatly used. Finally, get to making new décor pieces for you backyard.

Here are some great ideas for you to try.

Bird Feeders – These will be great to use outside. Give your back yard a nice touch with homemade bird-feeders. All you have to do is cut a circle (big enough for a bird) about 4 inches from the bottom of the bottle. Now paint the bottle with non-toxic paint in any color. Decorate it with any art that you want. Maybe a welcome sign? Now glue a wooden rod by the hole. Let it dry. Fill it with bird seeds, hang it up and let the birds enjoy the feeder. Beware their cousins, the squirrels, might try to eat the seeds too.

Straw Chimes – These do not make noise but are beautiful to look at. All you need is some imagination. Save straws of many colors and sizes. Use clear thread and creative with the design and length of your chime. You can hang them off tree branches. Use white straws for a more elegant charm. Use colorful straws for a more festive vibe. Use a mixture of sizes for an eclectic look. You can even run a thread through the middle of the chime and add a bell if you want some noise.

10 Mistakes: You Are Building That Green Home WrongMini-Luminaires – Light up the deck with these unique lights. Cut the bottles in half and paint the bottom half white, red, orange, yellow, or light green. Fill them up with sand (from your backyard) and put tea lights in them.

Cardboard Deco Box – Use cardboard boxes as deco pieces on your backyard deck. Paint them and add some flare buy making a collage one with extra scraps of magazine clippings. Paint one box black and the other one white. Stack them on top of each other to get a modern art vibe.

Decoupage Lanterns – Have any leftover balloons? Use them to make decoupage lanterns. Blow up the balloon and tie it. Tape it to a flat surface. Mix glue and water to get a watery sticky glue mixture. Cut strands of colorful paper, magazine clippings, newspaper, etc. Dip them into the mixture and place them on the balloon in random spots until the balloon is covered. Once dried, pop the balloon and pull it out. You have beautiful lanterns to hangs. Add lights to them if you want.

Yes these might seem like little décor items, but trust me, they will elevate your backyard to a whole new level.

Categories
Eco Tips Furnishings Recycling

9 Eco-Friendly Baby Nursery Ideas

eco-friendly-green-cribs-for-baby
http://goo.gl/ItGvqR

Now that your house is all eco-friendly, it is time to work on the new addition. The baby nursery can be beautiful and green (not the paint color, unless you want it to be). Here are some simple steps to help you make the perfect baby nursery eco-friendly.

No Diapers: I know you are maybe saying, “What am I going to use then?” The solution: Cloth diapers. They are more work, but cost less and they are not harming the world buy having a mini-vacation in landfills. They are less pollutant than a diaper. You can also look for companies that make biodegradable diapers.

Fresh Air: Purchase an air purifier. Make sure your princess or prince gets the room with the best view. The natural fresh air and sunlight are perfect. The air purifier will help eliminate mold spores, dust mites, and any excess moisture.

Safe Walls For All: Remember this slogan – VOC-free is better for me. Using paint that is VOC-free (volatile organic compounds) is environment friendly. You can even use mineral pigment paints. If you have to scrap away old paint please be aware that it might be lead paint especially if your house is very old. Just be careful to not chip it but lightly use sandpaper when removing it. You can also look for eco-friendly wallpaper options.

Furniture: When it comes to adding furniture into the nursery, keep this word in mind: RE-USE. Instead of spending more money on baby furniture, spend your time looking for items you already have. You can re-use an old bookshelf for baby toys, and books. Use an old dresser as a changing table. Of course put a comfy pad on the surface. Even ask family members for old baby stuff that they are willing to part with. You can even look up online for sites where you can find used baby furniture, toys, clothes, strollers, etc. Zwaggle.com is a great site.

Know Your Wood: If you do end up purchasing a new crib or rocking chair then make sure you know which wood is best for the baby. Stay away from plywood and fiberboard. The glue in them release chemical fumes after time.  Purchase real wood with water based finishes. Also make sure the wood is sustainable. Look for FSC-certified wood labels. The crib might cost more but you can easily make it an eco-friendly heirloom for future generations.

Perfect Floor: One word- Bamboo. It is a renewable resource. Plus it gives the nursery an elegant look.

Green Windows: Stay away from blinds, and shutters. Use organic cotton window treatments.

Crib Décor: When it comes to a baby’s mattress I recommend Naturepedic. All of their mattresses are made of non-toxic materials. They are great for your baby who will spend most of their early years in bed sleeping. All the crib linens should be made of organic cotton, wool, or linen. You can even make a quilt out of used baby clothes. That is if you sew. If not then have someone make you one.

Minimal Is The Key: Keep the décor of the room minimalistic. A few stuff toys, and books here and there will be sufficient enough. As time passes the baby will get more stuff.

Hopefully these tips help you make your baby nursery eco-friendly and safe for your new addition.