Categories
Eco Tips

How To Make Your House Sparkle Without Destroying The Earth

We spend so much time making sure our homes are spotless that we never stop to ask how that affect’s everyone’s home. If your own apartment is neat and clean but the environment is a mess, then you are doing it wrong. No need to despair, it is possible to be green even during your cleaning routine, just follow these tips.

green-home-eco-friendly

Try to DIY

We live in a wonderful era of information and we can all learn how to make our own cleaning products. Home-mixed cleaners are good for the environment because they avoid toxic substances that can damage your family or pollute water sources. What’s even better, they are usually very cheap to make, so you are helping your pockets as well. If you are afraid you will have to go out scavenger-hunting for obscure ingredients, fear no more: you have them in your pantry. Almost every mess in your home can be cleaned with a mixture of vinegar or baking soda and warm water. Dissolve grease, get rid of mold, shine your surfaces and get rid of water residue without buying a single cleaning product.

Toss the antibacterial cleaners

Antibacterial or antimicrobial cleaners are not as necessary as all those alarming TV ads would have you believe. In fact, they might even be counter-productive, as they carry the risk of breeding “super germs” that can get your family sick and are harder to kill. The FDA found that antimicrobial and antibacterial soaps and cleaners are not better at getting rid of germs than regular hand soap, so you should really avoid them.

Don’t buy air-fresheners

Air fresheners are usually toxic, they make the air quality in your home worse and they can even be harmful to the ozone layer. If you want your home to smell great all the time, get indoor plants. Broad, green leaves are great at filtering and renewing the air in your house, even if they don’t make it smell different. If you do want the smell, boil cinnamon, cloves or any other herb or spice that you like. If your carpets smell weird, sprinkle them with baking soda and let it soak up the smell before vacuuming it up.

Be mindful when discarding toxic cleaners

Whether you are replacing all of your toxic cleaners for greener brands or just tossing out old containers, avoid leaving toxic products in the trash. If the product is toxic for your home, it will be for the environment. Tossing toxic containers in the trash or pouring products down the drain is a great way to make sure the landfill gets full of harmful chemicals and your water supply contaminated. Your neighborhood or community probably holds toxic and electronics recycling days, so you can take them there to be disposed of responsibly.

Categories
Home Decor Recycling

Quick DIY Projects For Your Home

Instead of buying more and more decorations (and in turn piling up trash on our landfills), it’s always satisfying to make your own little projects to pretty up your home. If you are using recycled or organic materials, all the better! If you really want to give DIY a go but feel like you don’t have the time, give these 5 minute projects a go.

From burlap to art

If you have some burlap laying around, you can pretty easily turn it into a chic art piece that will give your home a boho touch. You will need a piece of burlap, a stencil, craft paint and some sponges. Oh, and a frame to display it too. If you don’t want to buy anything, you can make your own stencil out of cardboard too. Place the stencil on the burlap and use the sponges to dab paint in bright colors through the shapes. Carefully retire the stencil and leave the piece to dry. Frame it and display on your favorite corner of the house.

shoebox-projector-DIY-iPhone-smartphone
Quick DIY Projects For Your Home

Shoebox projector

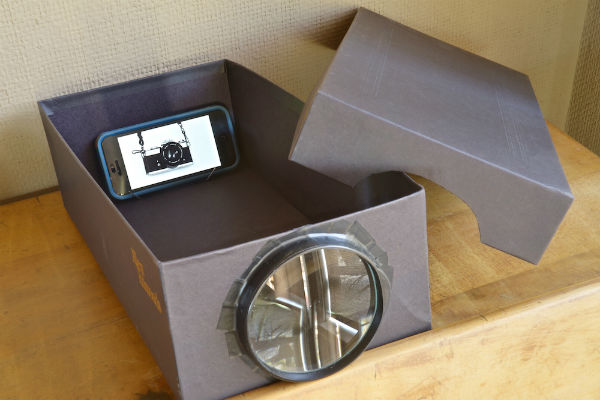
Nowadays there are some really fancy iPhone projectors out there. Electronic waste is a problem, though and how often are you going to use that projector? If you really need one right now, you can make your own for one dollar. Get a shoebox with a lid, a paperclip, duct tape (black) and a magnifying glass that you can get for one buck at the dollar store. If the inside of your box is not black, you might want to spray paint it or tape some black paper. Trace the edge of the magnifying glass (without the handle) on one of the short sides of the box and carefully cut it out. Line up the lens with the hole and tape it, covering the entire edge with duct ape, so no light leaks around it. Now bend the paperclip into a phone stand (or use a cheap stand you already have) and place the phone all the way to the back of the box, turn it on and admire the projection on the wall. To find focus, slowly walk forwards or backwards until you see a clear picture. Fine tune the focus by moving the phone closer to the lens if you want. Now sit back, relax and enjoy your photos and videos.

Flower stamps out of okra

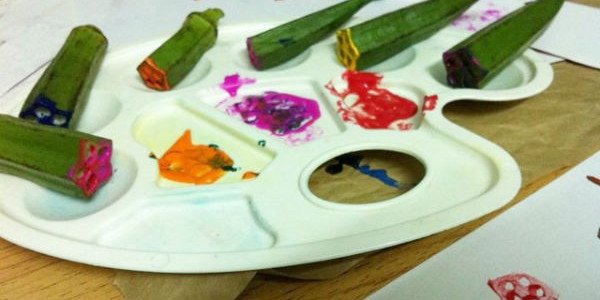
If you have some okra handy, you can quickly turn it into a flower stamp. By quickly I mean “in seconds”. Simply cut it in half to reveal the hidden flower within. Turns out that it has a surprisingly flower-like pattern and just the right texture to leave a clear image in paper or fabric. Dip your okra in ink, fabric paint or any other pigment and press down to see pretty flowers in your next project.

Categories
Eco Tips

Camping Hacks For Your Next Eco Trip

Camping is the perfect green vacation. It will make you feel in contact with nature, enjoying the wonderful world we live in. Besides, it has a low impact on the environment (just remember to “leave no trace”) and it saves you money. It doesn’t matter if you are a seasoned camper or if you are thinking of experiencing the great outdoors for the first time, these are some genius hacks to make your next camping trip easier.

Keep mosquitoes away naturally – Mosquitoes can ruin anyone’s night. They are annoying and relentless, but repellent sprays are harmful for the environment and loaded with awful chemicals. To truly keep the little pests away from your campsite, throw some sage into the fire, you will be surprised with the results.

DIY-egg-carton-firestarter-coal

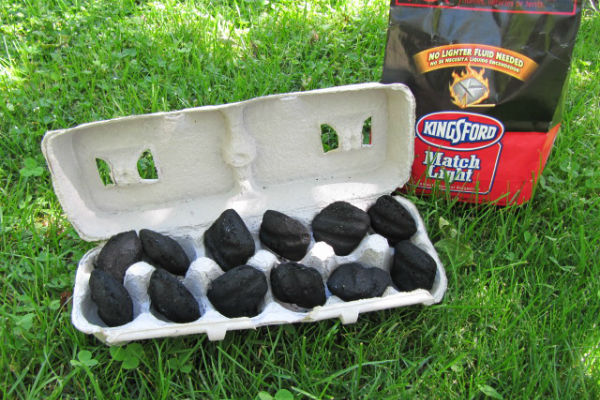
Turn egg cartons into fire starters – Instead of throwing away your paper egg cartons, save them for your next camping trip. Fill an egg carton with light charcoal and close it. Whenever you want to get your campfire going, just lit it up. You will get a blazing fire in no time that will keep you warm and help you cook food without wasting gas or fuel like a stove. Just make sure to follow your campsite’s regulations when it comes to campfires.

Cook with natural herbs – If you are going to use your campfire to cook meats and veggies, avoid bottled marinades that are full of preservatives, take up space in your bag and contribute to the garbage problem. Instead, throw rosemary or other aromatic herbs right into the fire while you are cooking. You will get a nice smokey flavor in the most natural way, and your meals will taste amazing.

Filter water with nothing but cloth – Clean water is absolutely necessary, I don’t need to tell you that. It is recommended that you take plenty of water with you, but if you find yourself without bottled water and no other means to purify dirty water, this method can help you out. Put the dirty water into a container and stick the end of a piece of cloth in it. Put the other end of the cloth in the other container and wait for a bit. The water will filter itself through the cloth and you’ll end up with a container of clean water and another of dry sediment.

Bring a Frisbee – Never underestimate the power of the Frisbee. They are extremely fun, so you can enjoy your time outdoors by doing some exercise with your family and friends, sure, but they have some hidden uses as well. In a pinch, your Frisbee can be a cutting board, a plate, a water container and even a shovel. No camping bag is complete without a Frisbee.

Categories
Home Improvement Recycling

Recently Moved? Upcycle Your Cardboard Boxes!

What is “upcycling”? It’s when you use discarded materials to create something new. Something useful, beautiful and with much more value than it originally had. For example, instead of throwing out or recycling cardboard boxes, your can upcycle them to create these great items.

desktop-organizer-cardboard-upcycle

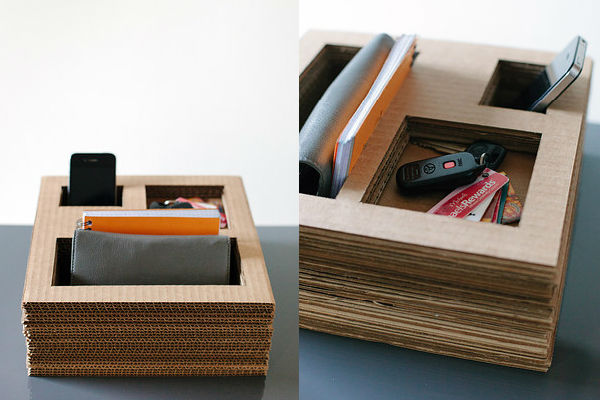
Desktop organizer – If you are normally dealing with a lot of clutter in your desk and don’t know what to do about it, then this project is for you if you have a lot of leftover cardboard from the move, use them to cut around 20 square sheets (or any shape, as long as they are identical). Leave one to serve as a base and then cut slots in different sizes on the rest, to hold your items. The idea is to have around 5-10 sheets with the same slots (depending on the depth you need) and then simply stack them all and clue them together. You can later paint the whole ensemble or add details to make it match the rest of your desk. Now you have a single place to keep your little notepads, your keys, spare change and your cellphone.

cardboard-box-bookcase-DIY

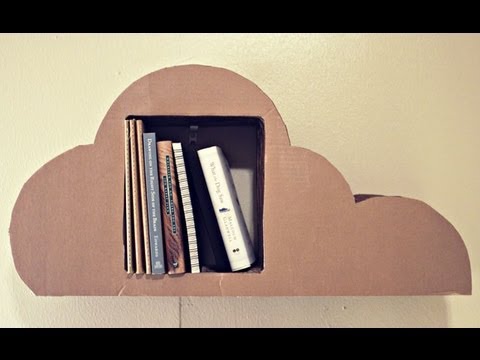
Bookcase – This process is similar to the one used for the desktop organizer. You simply pick a shape that works for what you have in mind and cut several sheets of cardboard with that same shape. Carve out some slots of the desired size and make sure your books and notepads will fit. Now hang it on the wall and enjoy your new stylish and environmentally friendly bookcase.

cardboard-box-modern-art-wall

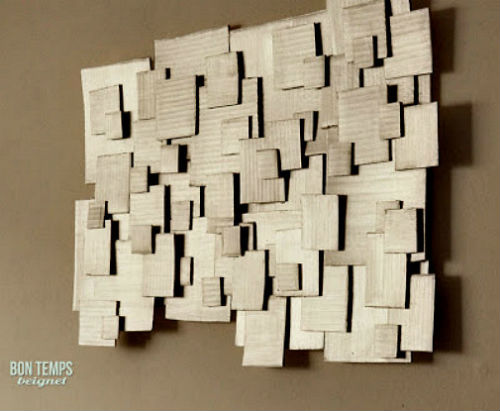
Modern wall art – This is a fun project that anyone can manage, no matter their artistic ability. Get all your cardboard scarps and cut them into small squares and rectangles of different sizes. Now place them together in a geometric composition. Don’t be afraid to make them overlap to get an interesting sense of depth. Once you are satisfied with the look of your piece, carefully glue them all together and finish with a coat or two of metallic paint. Glue the whole set to a support to be able to hang it from the wall and decorate your favorite room with it.

DIY-upcycle-cardboard-lantern

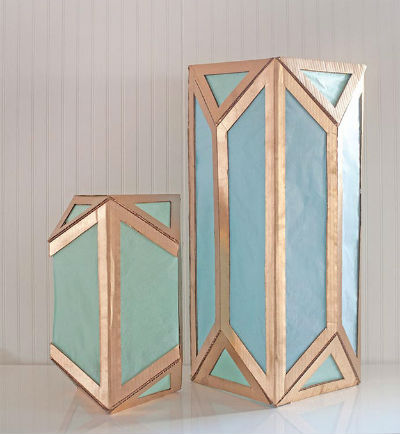
Geometric lamp – Cut out a cardboard frame for these lanterns, glue it together and coat it with your favorite color of spray paint. Then, use a colored tissue paper to cover the panels of the lamp, gluing it on the inside of the frame. Use cardboard for the top panel of the lamp, painted in the same color as the rest of the frame. Cut out a small slot to hang a string of twine. Tape the twine to the back of a battery-operated LED light and hang it on the inside of your lamp. Now you can enjoy a beautiful light fixture that people won’t believe you made yourself.

Categories
Home Improvement

Improve Your Home On The Cheap With These DIY Projects

If you are thinking about improving your home but are not particularly keen on paying ridiculous amounts of money to do so, you probably thought about doing it yourself. And you can, with these cheap and easy DIY projects, your home will look and feel so much better, without breaking the bank.

wainscoting-frames-wall-DIY

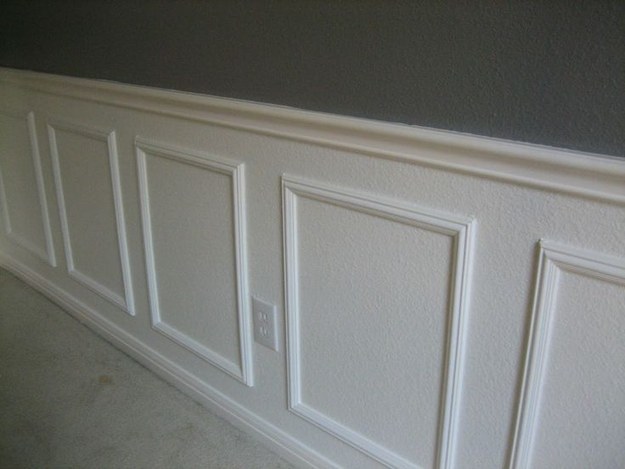
1. Create wainscoting with cheap frames. Instead of paying all the money for it, go to your favorite craft store and buy basic, cheap frames. Secure them to the wall to create that classic pattern and then paint them to match. Your living room will look so much classier and your guests will be none the wiser.

2. Peel-and-stick tiles hide water stains. If your bathroom or kitchen cabinet has leaked for any amount of time, chances are, there are water stains on the cabinet bottom. Instead of removing the bottom or sighing every time you open the doors, cover the water damage with peel and stick tiles. They are incredibly easy to install, they will make the whole thing look better, and nobody inspects your cabinet bottoms close enough to determine they are peel and stick tiles.

3. Hopelessly moldy shower? Re-grout and Re-caulk it. We are all fans of homemade cleaning products and other hacks to remove mold from the shower, but some times not even all the vinegar in the world can fix it. You have to address the root of the problem. Removing all the caulk and grout from your shower tiles is not a difficult process, it’s just time consuming. After you do that, clean well with a bleach solution, let it dry for 24 hours and apply new grout and caulk. Make sure you look for a brand specifically made for bathrooms, as it will be mold-resistant. Just remember, when in doubt, look up YouTube videos to really get the technique down.

4. Don’t throw out the old, tired armchair and sofa, just re-stuff the cushions. Instead of buying a new armchair and sofa, renew them with more stuffing. Perk up the cushions and get rid of the sagging look on the cheap by simply buying new stuffing. It won’t only look better, it will also feel more comfortable as well.

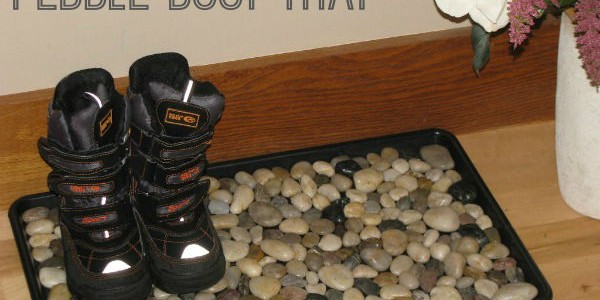
5. Stop your shoes from ruining your floors. If you have carpet or wood floors, you know shoes are your greatest enemies. Snow, rain, dirt, all of that takes its toll. And it doesn’t matter if you force everyone to remove their shoes as soon as they come in, because the floor near the door will still get ruined. Fix this with a simple pebble tray. It’s extremely cheap, all you need is pebbles and a tray. Put it near the door, and leave soaking wet shoes there. It looks nice, it’s practical and it costs almost nothing.

Categories
Articles Home Decor Recycling

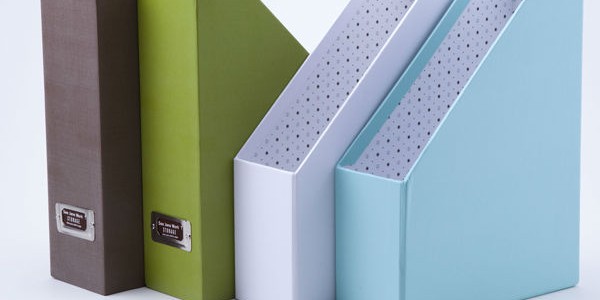
8 Smart Ways To Organize Your Life With Magazine Holders

If you really want to have an eco-friendly house, then recycling is the way to go. But there are more ways to do that than separating glass from plastic when taking the trash out. Another big part of recycling is finding new life for common objects. Like magazine holders. Despite having an incredibly specific name, they can be used for more than just holding magazines. Organize your house (and your life), save space and impress your friends with your craftiness, all with the help of the humble magazine holder.

magazine-holder-make-up-organizing-DIY

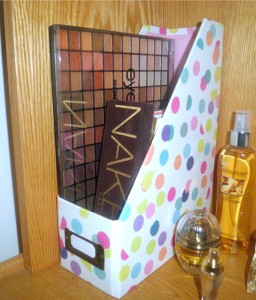
1. Organize your make-up

With the help of a cute, decorative magazine holder, instantly get rid of the chaos that seems to follow your make-up wherever it goes.

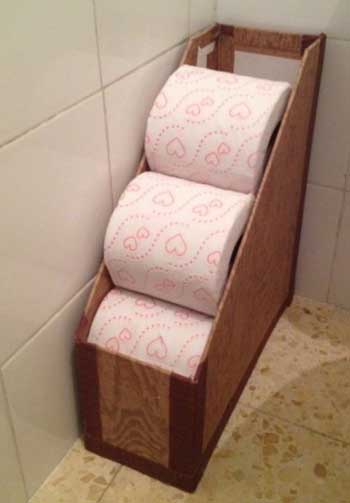
magazine-holder-toilet-paper-DIY-bathroom2. Organize your toilet paper

This is the last time you will find yourself in the toilet without toilet paper. Your rolls will be dry and always at reach so you can finally do your business in peace. Your guests will silently thank you too, since they will avoid the awkward “there’s no toilet paper how do I ask the host” dance.

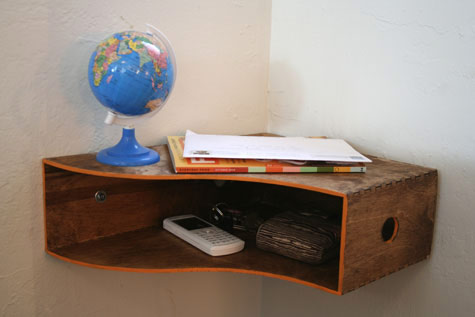
magazine-holder-corner-shelf-clutter-DIY3. Organize your clutter

Find a nice wooden magazine holder and secure it to the wall in an unused corner. Now you have a place to store all the tiny objects that clutter your desks and tables but somehow manage to get lost every time you need them.

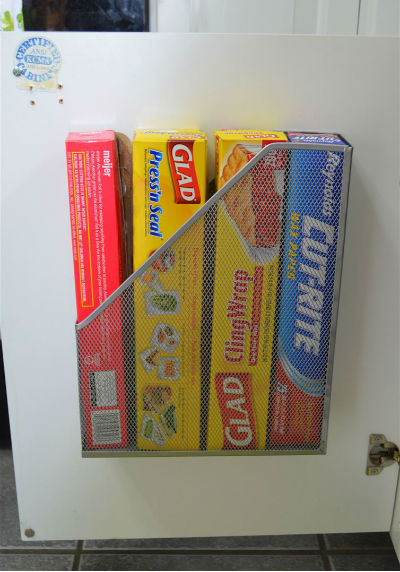
magazine-holder-cling-wrap-kitchen-cabinet4. Organize your cling wrap

And your tin foil, wax paper, etc. Instead of letting those boxes occupy space in your drawers, store them in a magazine holder in the inside of a cabinet door. This will save you space and time.

magazine-holders-organize-mail-DIY

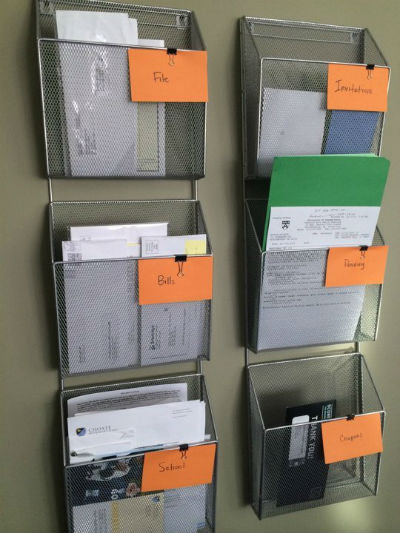
5. Organize your mail

Secure a magazine holder (or several) to your wall and file all your mail, bills, important and unimportant documents, and every other piece of paper that always ends up getting lost when you need it.

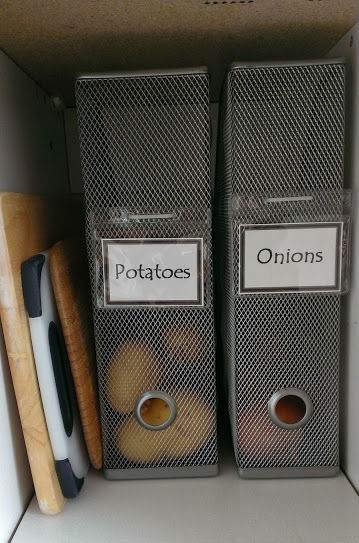
magazine-holders-potatoes-onions-kitchen6. Organize your produce

Keep your onions, potatoes and other non-refrigerated produce from rolling away with a couple of well-placed magazine holders. You will keep your counters and cabinet clean, and you will always know when you need to buy more produce.

magazine-holder-curling-irons-DIY

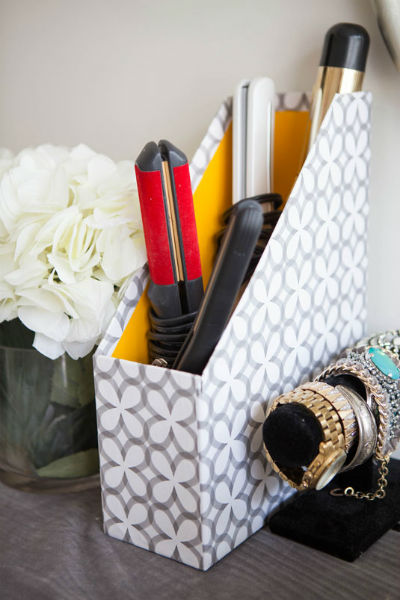
7. Organize your curling irons

Hair styling requires a whole lot of products and appliances (at least, if you are like me it does). Keep your hot irons safely stored, secured and organized with a decorative magazine holder. This will also prevent all the cords from tangling, which will prolong their lifespan and save you time in the mornings.

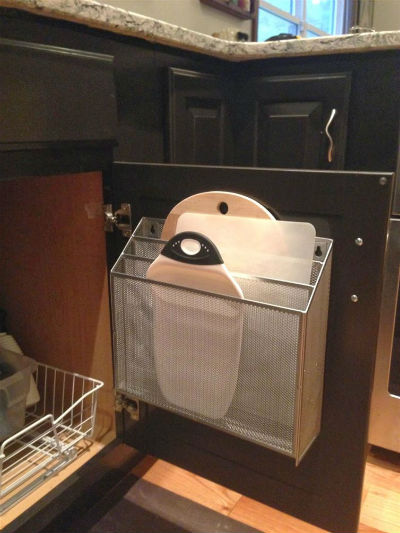
magazine-holder-cutting-boards-kitchen-cabinet

8. Organize your cutting boards

Secure a magazine holder to the inside of a kitchen cabinet and keep your cutting boards dry, organized and always at reach. This will help you save space in your kitchen, reduce all the clutter and make your cooking a lot easier.


Categories
Eco Tips Furnishings Home Decor Home Design

Fun Eco-Furnishing Ideas That Your House Would Love To Showcase

branch-shelf-eco-friendly-furnishing Decorating a home can be so much fun and so expensive. In this case we went a different route since it is an eco-friendly home. We went low in cost and expensive in taste. A lot of your home furnishing can be made by hand. You know who can make them? You! Your hands can make amazing furniture that you will cherish for a long time.

Here are some fun eco-furnishing ideas that your house would love to showcase and you would surely brag about because you made them yourself.

  • Mulch Pop Art – You will need a picture frame. You can repurpose one or purchase one at a thrift store. Purchase some mulch and separate them in to 8 different buckets. Add a different paint color in each one. Just toss the mulch a bit so that it does not get clumpy. Now take the glass off the picture frame. You have your frame backboard now to make art pop. Use eco-friendly wood glue on the frame backboard. Use the mulch and make a colorful word, or face. Get creative.
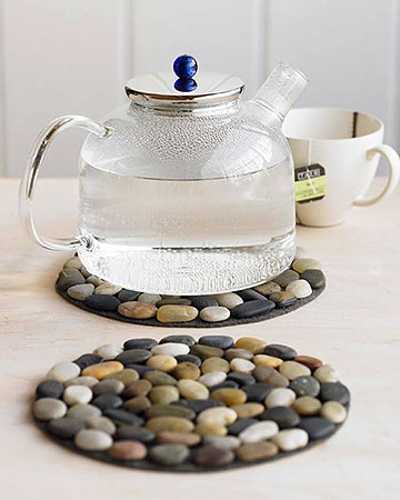
  • Pebble Hot Pad – Collect some river pebbles or stones and glue them to a circular piece of wood. Now you can use it to put your tea kettle and hot plates on.

hot-pads-river-pebbles-eco-decor

  • Yarn of Fate – In this case… ‘fate’ will be ‘photos’. Go to a salvage yard and purchase old nails, at least 30 of them. You will need some strong twine too and clips. Find a bare wall in your home. Use a pencil and mark out where each nail will go. Make them far apart from each other and have some zigzag. Now hammer them in. Now tie the twine to one of the nails and loop it around the other nails to make lines. When you get to the last nail make sure the twine is strong and tight. Tie it up. Now look for old photos of family, friends, yourself, postcards, etc. Clip them along the twine. You have a one-of-a-kind collage piece.
  • Tree Stump Side Tables – A very simple d.i.y. Get a tree stump with a flat surface. Dry it out, and then chisel away the bark. Now sand it down. You are done. Take an extra step if you want by painting them or adding some varnish. It is up to you.
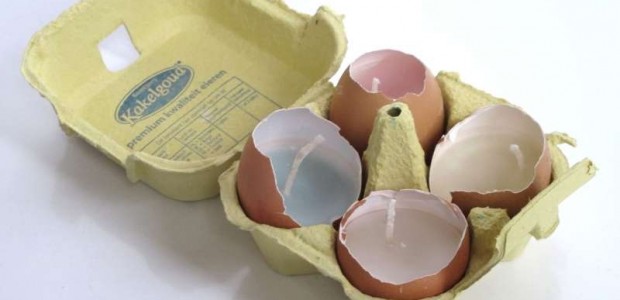
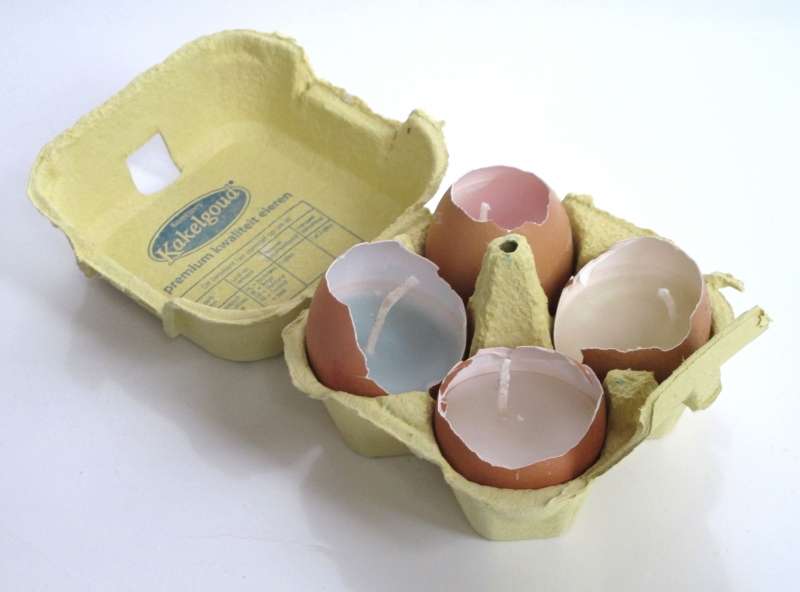
  • Eggshell Candles – Save those eggshells after you crack them. Give them a good rinse and let them dry. Fill them with wax and a wick and you have the best eco-friendly light ever. You can even make them colorful by melting crayons and filling the eggshells with your color of choice. Set them right on top of the tree stump table.

eggshell-candles-eco-friendly-idea

  • Tree Shelves – Find a thick tree branch. Saw of any excess, and screw it in the wall. You can display small plush toys and trinkets.

There you have it! You can now make these simple yet fun furnishings for your home. The best part is that they are all eco-friendly. Look at nature differently. The next time you are out looking for something to bring into the house remember to ask yourself if you can make it and if there are materials already available for use. Get to having fun the eco-conscious way.