Categories
Articles Eco Tips Home Improvement

4 Easy Ways to Save Energy

For many people, the thought of going green and becoming eco-friendly seems overwhelming and costly. However, one of the easiest ways to make your home more “green” is to cut the amount of energy your home consumes. Not only will learning how to cut your energy use be beneficial for the environment, but it will also help to cut the amount of money you spend each month for energy costs. Here are 4 easy ways to start saving energy.

Kill the Energy Vampires

Energy vampires are the electronics and small appliances in your home that continue to “suck energy” when they aren’t in use. By unplugging all the small appliances and electronics in your home when they are not being used, you can save a few hundred dollars each year on energy costs. Some of the most common energy vampires include; toasters, coffee makers, cell phones, television sets, gaming equipment and computers.

Doing the Dishes

Each time you load the dishwasher you are using a lot of water as well as a lot of energy to heat the water. Whenever possible, wash dishes by hand or wait until the dishwasher is full before running it.

  • When washing dishes by hand, wash several pieces and rinse them all at once, instead of leaving the water running to rinse each piece as it is washed.
  • If you use the dishwasher,choose the energy-saving option and/or an air dry option to cut the amount of energy it takes for the dishwasher to heat dry the items.

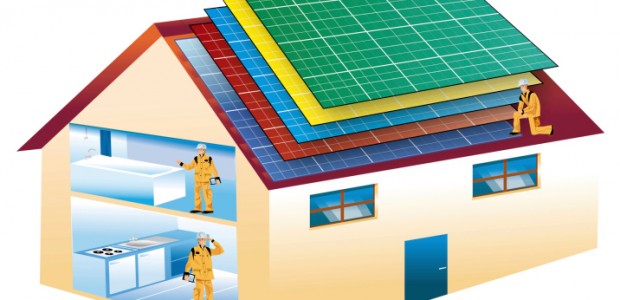
Is the Attic Insulated?

Many homes, especially older homes, do not have enough insulation in the attic to keep their home at a comfortable temperature, which causes the furnace and/or the air conditioner to work harder than it should. Inspect the attic for areas where air is entering or escaping, such as around windows and in the rafters. For small places, you can use a spray foam, which expands and blocks drafts and if the rafters are bare, it is best to use a rolled insulation to fill them in.

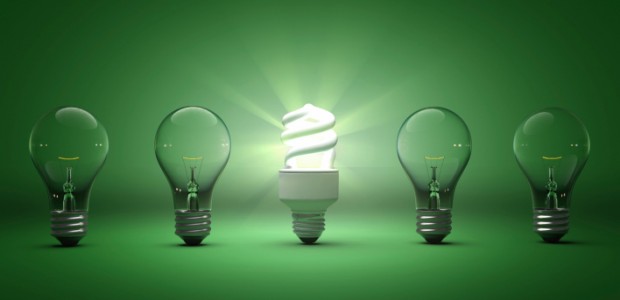
Change the Light Bulbs

One of the easiest and least expensive ways to “go green” and save money on energy costs is to remove traditional bulbs and install LED bulbs. LED bulbs last longer than standard bulbs, so you will save money by not having to replace them as often and they use less energy.

Making the change to have a “greener” home is a process that can’t be done overnight. However, as insignificant as the small changes seem, such as changing light bulbs, each small step you take will have an impact on saving the environment as well as saving money on your home’s energy costs.

~Rene W.

Categories
Eco Tips Recycling Uncategorized

Online Social Recycling

It’s happening again. You’re online connecting with friends, posting pictures, and responding to event invites. Eventually, you become vaguely aware that clearing out the closet is fast becoming a fading dream, but it doesn’t have to be. You can do it all with social recycling.

Invite Friends to Spark Online Chatter

With social media, you can invite your friends to an event, group page, or hangout without using your personal homepage as a source of contact. Instead, you can create an alternate way to exchange information for your online recycling project:

  • Facebook events: set a date and time for a recycling event and invite your friends
  • Facebook groups: create a group page focused on exchanging and recycling items
  • Google Hangouts: have a video chat with friends to plan upcoming recycling plans
  • Twitter: tweet about your upcoming event or post photos of items looking for a home

Events

If you can create an event to meet friends for dinner or a birthday, you can create one to host a recycling party, event, or both. Do yourself a favor and ask if a few guests can arrive early to help sort clothing types and sizes, books, toys and other items. Consider these event ideas as a starting-off point:

  • Throw a clothing-swap party in the day for kids or at night for adults
  • Schedule a yard-sale event or combine forces, making it a neighborhood event
  • Create an online flea-market event or page, so everyone can post photos of wares to share

Volunteer Meet-ups

Sometimes it’s not possible to host a gathering in your home, but you can still host a meet-up with your Facebook, Google and Twitter friends at an organization looking for volunteers. Here are a few suggestions to consider:

  • Meet at your local animal shelter and bring blankets, sheets, bath- and beached-sized towels
  • Choose a non-profit, such as Dress For Success or Career Gear, and donate gently used clothes
  • Volunteer at a local library and donate your used books, CDs, cassettes, records, and DVDs
  • Roll up your sleeves and build your own Little Free Library or your neighborhood

When you create events with friends and family, you create memories. These are special because of the company and the intention. So the next time you’re whiling away the time online, have some productive fun with social recycling—create new memories and clear that closet out.

~Maureen F.

Categories
Lawn & Garden

Keep Your Garden Healthy: Tips for Natural Ways to Prevent Pests and Common Plant Diseases

After spending hours tilling and planting the garden, the last thing you want is for all of your plants to become pest infested and/or covered in fungus or powdery mildew. Applying pesticides will add harmful chemicals to your crops, the soil and future plantings as well as effect the flavor of your fruits and vegetables. There are a range of safe and natural things you can do to keep your current and future garden healthy.

Start With the Soil

The soil is the first place to begin controlling disease and insects in an organic garden. Using soil that is full of organic nutrients and matter will help your plants thrive and produce a healthy, productive crop. Insects and diseases thrive off of injured and weak plants, but when they are strong and healthy, garden plants have an ability to change their chemistry naturally in order to defend against its enemies. Things you can do to strengthen the soil include:

  • Adding compost materials to the soil before planting. Items such as egg shells will provide natural nutrients to the soil.
  • Always mulch the surface of the garden to help suppress weeds, protect soil erosion, increase earthworm activity and prevent slugs and snails from taking over. Leaves, straw, pine needles and grass clippings make excellent mulch for a garden.

Prevent Fungus 

The best way to fight fungus in the garden is by using natural items you probably already have in the kitchen. These simple remedies will help to safely and naturally keep out common problems, such as fungus and disease.

  • Apple cider vinegar is excellent for treating a range of plant diseases, such as black spots and powdery mildew. In a spray bottle, mix 3 tablespoons of apple cider vinegar with 2 quarts of water. Spray the infected plants with the solution when the temperatures are the coolest, such as in the morning or early evening. Avoid spraying the plants when there is direct sunlight on them and repeat daily until the condition is cured.
  • Milk is an ideal virus and fungus fighter for the garden. To prevent fungus, simply sprinkle a few tablespoons of powdered milk in the soil before planting. If you notice fungus on the leaves of plants, spray a mixture of equal parts of milk and water (1-cup milk and 1-cup water) directly on the infected leaves.
  • Baking soda is an excellent treatment for plant fungus. In a spray bottle, mix 1 tablespoon vegetable oil, a few drops of liquid, biodegradable dish-washing liquid and 1 tablespoon of baking soda. Spray the infected plants, including the base of the plant and the underside of leaves.

To help keep your garden healthy year after year, it is important to rotate the crops. Avoid overwatering plants, especially if you are noticing fungus or mildew. An excellent way to improve the health of your garden as well as try new garden foods, is with companion planting. Companion planting simply means arranging plants that are beneficial for each other. For example, planting a strong smelling herb near the vegetables will prevent insects from smelling the vegetable plants.

~Rene W.

Categories
Eco Tips Home Design

Eliminate Fossil Fuels, Electric Bills and Natural Gas Bills With Solar

While the pressure to find alternatives to fossil fuels has eased due to somewhat lower gas prices and the media attention has shifted away from the ecology again, that doesn’t mean these issues have gone away. In fact, based on past behaviors, these issues will come to a peak yet again sometime in the future. However, one way you can know you’re doing your part for the ecology, plus saving yourself a lot of money in the process, is to switch everything you have to solar power.

You may wonder how this is possible. With today’s technology, not only is solar power more affordable and efficient than ever, but by replacing or supplanting what you currently have with electric equivalents, you can actually accomplish this. Here’s how:

  • After installing a solar system, replace appliances that use natural gas with electric ones. This includes hot water heaters, stoves, ranges and ovens.
  • Replace your heating system that may use natural gas, kerosene or fuel oil with an electric one.
  • If possible, replace your vehicles with EV (electric vehicle) equivalents. Today, not only can you find small vehicles that are EVs, but SUVs and performance vehicles as well.

Granted, the initial investment in solar isn’t cheap and replacing your existing natural gas appliances and gasoline powered vehicles isn’t an inexpensive prospect, there are lots of compensations. First and foremost, you’ll receive tax breaks from the Federal government and many state governments also provide tax breaks as well.

Also, since you’ll have eliminated electric bills, natural gas bills and gasoline expenses, those funds can be applied to defraying the costs of the solar build. What most people don’t realize is that going solar can actually be subsidized by the electric companies as well. That’s because excess electricity generated by your solar system can be “sent” through the existing power grid and redistributed by the electric companies. This means you can actually accrue credits or even be paid by the electric companies for your excess electricity.

Determining your actual ROI (Return On Investment) can be somewhat challenging. Most solar ROI calculators are limited, but can give you a general idea of your break even points. By replacing fossil fuel factors, this number can drop dramatically which means you could actually be making money from your solar system in just a few years. Not only can you save money and reduce your carbon footprint with solar, you could actually make money in the process!

~Brian C.

Categories
Eco Eats

Fresh and Easy Strawberry Pie Recipe

In honor of National Pie Day, we have decided to share a delicious Strawberry Pie recipe with you. Strawberries are currently in season, so be sure to pick some up from your local farmer’s market.

Sweet Strawberry Pie

Ingredients:

1 C- Sugar

1 C- Water

3 TBSP- Strawberry gelatin Mix

3 heaping TBSP- Cornstarch

1 Pint Fresh Strawberries

1 pie crust

Optional Ingredients:

Whipped cream cheese

Whipped cream (for topping)

Graham cracker crust

Directions:

Combine sugar, cornstarch and dry gelatin mix by stirring well. Add water and cook until thick and clear over medium high heat. Make sure to stir constantly to prevent scorching. Set aside and let cool.

Wash and trim fresh strawberries (trim off the tops and the bottoms too if they aren’t “pretty”.) Cut in half and arrange over pie crust. When the filling has cooled (room temperature) pour over fresh strawberries.

Chill until served.

Additional notes:

You can garnish with whipped cream if desired! Sometimes when we make this we use fat free cream cheese, whip it with the mixer, and line the bottom of the pie crust (some say it helps to prevent soggy crust, we think it tastes delicious!) You can also make your own pie crust or use the premade ones!

Nutritional Info (approximate) Servings: 8/Amount per serving: 1/Calories per serving: 320/Total Fat: 14g/Cholesterol: 15mg/ Sodium: 180mg/Total Carbs: 48g/Dietary Fiber 3g/Protein 3g.

Recipe adapted from the Southern Living.

Categories
Lawn & Garden Recycling

3 Simple Steps to Create Your Own Rain Bucket

You have heard the old saying “April showers bring May flowers…” but did you realize you can save on your water bill and the environment just by investing in a rain bucket? A rain bucket can be anything you want it to be. Whether you use an old plastic moving tub, a plastic bucket, or even an old garbage pail, you can use those to collect greywater. A type of grey water is rainfall and while you can’t drink rainwater, your plants can certainly use it! You probably won’t collect enough water to water your plants throughout the entire season but it will certainly help keep the soil moist during the hot summer months.

Make sure to put your rain bucket near downspouts, that way the rain buckets can collect the water that lands on the roof. Your roof normally is the largest surface area so you will be able to collect the most water from these areas (a shed can work too!)

It is really easy to make your own rain bucket it just takes a little time and a trip to Lowes or the Home Depot (you might even have some of the materials in your garage!) For this project you are going to need:

1 – 32 Gallon Vinyl Trash can with Lid (preferably)
1 – 1″ PVC Male Hose Adapter
Drill with 1″ Spade Bit
White Caulking Plumbers tape

Step 1.  Once you have found the location you would like to place your rain bucket, measure and cut the downspout above or near the top of the rain bucket. Normally you would cut off part of the down spout so the end sits a little higher than your bucket. Cut a hole in the shape of the downspout near the top of the bucket. You can also cut an overflow hole about the same size on the other side to allow excess water to escape when it’s full.

Step 2. Next, drill a 1″ hole about 3-4 inches from the bottom of the rain barrel. Using some common plumbers tape, wrap the threads of the adapter to keep water from leaking through the hole. Screw adapter from the inside so the threads are exposed to the outside of the Rain.

Step 3. Insert the downspout pipe from the roof into the rain bucket and attach the overflow to the other side. Attach a garden hose to the bottom adapter and caulk around the gaps to ensure the unit is sealed. This is important as mosquitoes would love to nest in your rain barrel (if you don’t have a top for your rain bucket buy mesh netting.) Once everything is connected, fill with water and test. The pressure from the amount of water contained inside the rain bucket will allow you to water your plants without much difficulty.

You are now ready to sustainably water your flowers and vegetable gardens well into summer!

Sources: ezinearticles.com, (http://ezinearticles.com/?Make-a-Rain-Bucket-in-3-Easy-Steps&id=2441701).


Categories
Featured Recycling

6 Surprising Items That Can Be Recycled

Ever looked at an old pair of eyeglasses and wondered if it could be recycled or have a collection of old wine corks and didn’t know what to do with them? We have compiled a list of some surprising things that can be recycled.

Eyeglasses

When your prescription changes or you decide you want new frames, don’t just throw away your unwanted glasses! New Eyes for the Needy is committed to providing corrective eyewear to people who need them in the United States, or elsewhere on the planet or in developing countries.

Foam Peanuts

Even though they protect your fragile package from breaking, foam peanuts have to be one of the most annoying things ever when they escape from their box. Since they have been such a nuisance filling up our landfills some companies are making the “foam” peanuts from vegetable starch. The peanuts made from vegetable starch are non-toxic and biodegradable (if you put one in water and it disintegrates you have the earth-friendly ones)!  If you have the other kind of foam peanut you can call The Peanut Hotline (not a joke!) at (800)828-2214 for a list of places that will take them off your hands.

Holiday Lights

Got burnt out holiday lights? The folks at HolidayLEDs will gladly take your old lights, shred them, and sort the remaining PVC, glass, and copper. Those raw materials are taken to another recycling center and resurrected as something new. They start collecting lights at the end of October and it accepts lights until the end of February.

Crayons

Don’t toss those broken and stubby Crayolas! Instead, mail them to the National Crayon Recycle Program, which takes unusable, broken crayons to a better place. They’re melted in a vat of wax, remade, and resold. The program has saved over 47,000 pounds of crayons.

Fishing Line

Fishing line is made from monofilament, a non-biodegradable plastic that you can’t put in your everyday recycling bin. At Berkley Fishing, old fishing line is mixed with other recyclables (like milk cartons and plastic bottles) and transformed into fish-friendly habitats. So far, Berkley has saved and recycled more than 9 million miles of fishing line.

Wine Corks

Your recycling center probably doesn’t accept wine corks, but companies like Terracycle and Yemm and Hart will. They turn cork into flat sheets of tile, which you can use for flooring, walls, and veneer.


Categories
Eco Tips Featured Lawn & Garden Recycling

How to Create a Simple Compost Pile

Composting is a wonderful way to reuse kitchen scraps as well as discarded leaves, grass, and garden debris. Combined, these ingredients create a nutrient rich soil that your garden and indoor and outdoor plants will benefit from. There are many different ways you can make and maintain your own compost pile at home.

For inside your home, especially when a backyard is not accessible, you can make a hide-away trash bin in your kitchen to through away table scraps, any leaves you may pick up, newspapers, paper towels, cardboard and any other biodegradable materials you may find. Add water to keep your compost moist but never a watery consistency. It normally takes a couple of weeks for the compost to be ready. Use the compost soil at the bottom of the pile and use it for indoor plants or discard the soil at a local garden center or forest.

If you have a backyard, here are some different ways to create a simple compost pile:

  • For a homemade, standard compost pile, you will need three, five foot 2×4 wood slabs, a spool of mesh or chicken wiring and a staple gun. Cut the 2×4’s in half.  Find a secluded spot in your yard to put your compost pile.  Depending on how big you want your compost pile, measure and mark the area before building.  Once you’ve measured a space, place three pieces of the wood parallel to one another with enough space in between.  Place the mesh wiring on the inside of the wood slabs and then staple them to the wood.  Once assembled, begin composting!
  • If you don’t want to create your own compost pile, you can buy one from a Home Depot or Lowe’s hardware store.  You can also order compost bins online at compostbins.com or goodcompost.com.
Categories
Eco Tips Featured

8 Simple Ways to Use Coconut Oil

Coconut oil has become one of the most favored organic and eco-friendly products on the market due to its rewarding qualities.  I noticed the increase in popularity of coconut oil over the last few months and asked myself, “What is so special about this stuff other than cooking?”  I normally use coconut oil as a substitute for olive or vegetable oil in cooking because it contains healthier saturated fat.  So I did some research and learned that coconut oil can be used for more purposes other than a cooking aid.  It can be used for hair, skin, health, and household duties.  Who knew that coconut oil could cover such a broad spectrum of functions?

Coconut oil has the same consistency as lard and Crisco; therefore it is seen primarily as a cooking aid.  However, because of its consistency and natural qualities, it can be used to help with other functions such as body and household care. Here are four of many ways to use coconut oil for personal hygiene.

Coconut Oil Moisturizer – Extra virgin coconut oil would be the best for this.  You can find this at an organic food store or in the health and body aisle of a grocery store.  Just simply take some from the jar and apply to skin and use as much as needed. Simple!

Coconut Oil Deep Treatment Hair Conditioner – This is an overnight treatment, so a shower cap will be needed.  Apply a teaspoon of oil to the ends of your hair and run your fingers through.  For deep treatment, apply a teaspoon of oil to your scalp and massage it through to the ends of your hair.

Coconut Oil Ointment – This can be used for scrapes, bruises, or any other form of “boo-boo” that comes your way.  Apply a thin layer to the scrape or bruise.  This coating protects the area from dust, bacteria, etc.  It also gives a more pleasant odor than the medicinal brand.  Place a bandage over the affected area.

Make-Up Remover – Put some oil on a cotton ball or pad and wipe away the make-up.  It’s like Vaseline but without the harsh smell. It’s impressive how well this works!

Here are some interesting ways to utilize coconut oil for household purposes:

Coconut Oil “Goo Gone” – Mix equal portions of coconut oil and baking soda, then apply the mixture on the sticky residue area.  Wait for about five minutes before scrubbing the “goo gone” with a washcloth or scrub sponge.

Coconut Oil Furniture Polish – Mix oil with a bit of lemon juice for furniture polish.  Work the polish on a small portion of the furniture to test the consistency and strength you desire.

Coconut Oil Bronze Polish – Simply put some oil on a wash cloth and rub it over the bronze surface for a lustrous shine!  This will clean and deepen the color of the bronze.  This also works on stainless steel.

Coconut Oil Bug Repellent – Mix with some peppermint extract and rub into the skin.  No more chemicals and has a pleasant smell!

Categories
Recycling

6 Simple Ways to Get Kids to Recycle

With Earth Day quickly approaching it’s important to start to teach kids how to recycle, now. It normally takes about 21 days to form a new habit, which will leave a little wiggle room in time for Earth Day. Recycling is one of the easiest ways to help reduce your impact on the Earth. It is so important teach children about recycling at an early age so they will develop lifelong habits. Here are some easy tips and tricks to get your children excited to recycle!

Craft Time! Save a large storage box and fill it with old scraps of paper, milk cartons, left over ribbon, etc. Once a month have a craft afternoon and let your children’s creativity take over! You are going to be surprised with what creative and crazy ideas they come up with!

Decorate! Have your children decorate your recycling bins. When the children have a sense of ownership, they will be more inclined to take recycling more serious than before! Also you now have a one of a kind piece of yard artwork, that is sure to brighten up the curb! (If you have a city issued recycling bin be sure to check with your local officials to make sure it’s okay.)

Compost! Create a compost bin with your children. Creating a compost bin will help your children learn the difference between what is biodegradable and what is not. You can also use your compost to start a vegetable garden! Click here for tips on creating a simple compost!

Sing Along! When we were children we were taught life lessons through songs and recycling is not any different! Find a recycling tune and sing it when taking the recycling to the curb. We are a fan of Jack Johnson’s Three R’s (Reduce, Reuse, Recycle) from the Curious George’s soundtrack.  Check out the song here.

Sell! Have a garage sale. Make sure to explain the reasoning behind having a garage sale to the children. Be sure to explain that you do not just throw away things. Have your children choose a couple of toys to sell at the garage sale and let them keep the profit.

Donate! After your garage sale or after cleaning out your closets, be sure to donate all unwanted items to your local Goodwill or Salvation Army. Don’t forget to bring the kids along to drop off the donated items. Make sure to stress to them that nothing will be thrown away and every item will have a place to go.