Categories
Articles Lawn & Garden Recycling

Turning Your Backyard Into a Green-Living Haven

No home is complete without a spruced up backyard. Even if this outdoor area is rather small, with the right touch, it can look better than ever before, and more importantly, it can be used as a versatile form of living space. From outdoor kitchens to in-ground swimming pools, there are many ways to make use of a backyard. And best of all, there are many green-friendly techniques you can follow to ensure you turn your backyard into a green-living haven.

Revamp Your Used Furniture

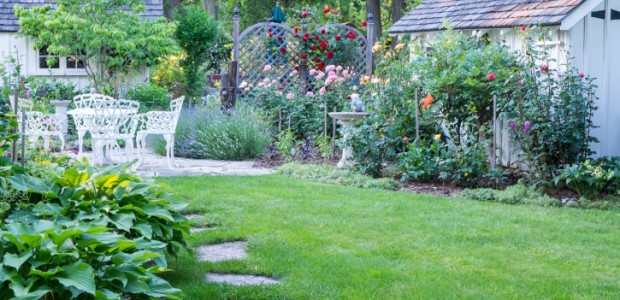
Your current outdoor patio furniture may seem a bit worn out, but by upcycling these pieces, you’ll be well on your way to revamping them into completely new pieces. From adding a fresh coat of paint to replacing the cushions, there are many affordable and eco-friendly methods for sprucing up old furniture and extending its longevity.

Be Cautious with the Way You Plant Flowers and Trees

If your backyard is spotted with plants, flowers and trees that require lots of water, you’ll at least want to group these together. In doing so, it will be easier to water these areas on a more consistent basis than you do other areas of the yard. Not only does this help conserve water, but it will do wonders for your water bill.

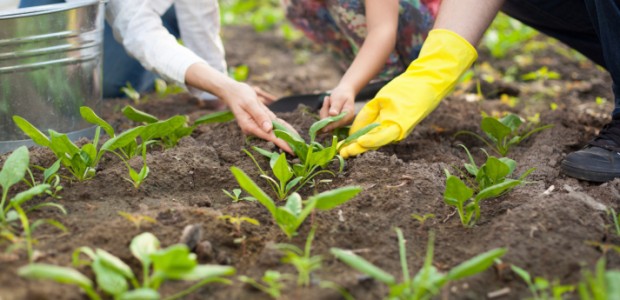
Do the Work Yourself

One of the best ways to create a backyard haven in a green-friendly way is by doing the work yourself. From raking the yard to digging holes to planting flowers, when you do things yourself, this allows you to accomplish your tasks in the greenest manners possible. And in addition to taking lots of pride in the end-product, you’ll also save a ton of money by doing the work yourself. Do keep in mind, though, that maintaining your backyard will take lots of work; it will need your attention all year long.

Categories
Articles Lawn & Garden Uncategorized

Getting Your Yard to Look Marvelous In a Budget-Friendly Manner

A large number of homeowners take a great deal of pride in their lawns. If you happen to be one of these people, there’s no need to stress about taking care of your lawn even if you’re on a budget. Let’s take a quick look at a few budget-friendly tips you can follow to keep your lawn looking its best all year long.

Swap out your services

If you have time to mow your own lawn, then by all means you should. If, however, time doesn’t permit, then you’ll need to hire someone to mow it for you. Unfortunately, paying for lawn mowing services can get quite expensive. Think about it, if you hire someone to mow your lawn for $50 a week, that’s still $200 a month, sometimes $250.

To avoid having to pay for lawn care, you could swap out your services. For example, if your lawn care guy has kids, you could offer to babysit one to two days/nights a week in exchange for mowing your lawn. It’s a win-win for everyone.

Make sure your lawn is mowed in the right manner

When mowing your lawn, it’s best to leave the mower blades high. In doing this, the grass will grow deeper roots, which means your grass will not only be thicker but healthier too.

Quit wasting time picking up any clippings

After your lawn gets mowed, it may be tempting to pick up any loose clippings. In all actuality, though, it’s best to leave them sitting as they are because they will eventually start to breakdown, which means they’ll be contributing nitrogen to your lawn and serve as a free form of grass fertilizer.

Plant your own flowers

Instead of paying a landscape specialist thousands of dollars to plant shrubs, trees and flowers, consider doing the work yourself. There are many free, online tutorials that you can use to walk you through all involved planting steps, and best of all, you’ll be able to take much pride in your yard once the work is done.

Water your lawn in the morning

According to Keypointapp, it’s best to water your lawn in the morning. The grass will soak up the water, and any excess water will evaporate before the day ends, meaning it’ll be less likely that fungus will form on your lawn.

Categories
Eco Tips Lawn & Garden Uncategorized

Low-maintenance, low-water: Herb and flower spiral garden

It is a challenge for gardeners in hot climates to maintain a working food or flower garden without using a ton of water. With water shortages prevalent throughout the south, it is important to consider planning your garden with water conservation in mind. Not only will it help the environment, it will preserve the health of your soil and vitality of your crop.

A common problem with over-head watering is the salt that builds up in the dirt from evaporation. When garden water evaporates, it leaves salts and other trace minerals behind which eventually can have negative consequences for the soil, which was one of the main problems during the great depression and the famous dust bowl .

There are a number of steps you can take to assure that minimal water will be wasted, while getting a maximum yield from your crop whether that is flowers or food.

A great way to conserve water is through the manipulation of the garden plot. To build a low water herb spiral, you’ll want to dig a bowl-shaped hole in the desired location. Pick an area of yard with adequate sunshine for a good portion of the day.

  • Dig the circle down about a foot deep and about three feet in diameter. You’ll want to have enough room for all of the herbs or flowers you plan to sow, making sure to leave at least 6 inches between each plant, also accounting for the width of that plant.
  • Layer about 4″ of gravel on the bottom, building a rock spiral off of that foundation. Fill the remaining structure with good quality potting soil. The gravel will hold the water at the bottom, keeping the soil at a regular moisture level without over-saturating.

This and other techniques can be utilized to conserve water without a bunch of consistent hassle. Just dig the spiral, lay the gravel, do some initial watering sufficient for transplanting, and watch it grow. This low maintenance herb spiral will last a long time, and collect rain water without any help from you. Happy gardening!

Categories
Eco Tips Lawn & Garden Uncategorized

Building and Decorating Your Patio In an Eco-Friendly Way

There’s something about the outdoors that makes people want to live a greener life. And this especially rings true for outdoor patio areas. Fortunately, there are many ways to build and transform patios into some of nature’s best friends.

Choose your construction materials wisely

It’s of the utmost importance to construct your patio areas using sustainable building materials. Some of the more eco-friendly materials to choose from include:

  • Reclaimed brick
  • Recycled stone pavers
  • Natural stone
  • Locally produced bricks
  • Responsibly harvested wood

Choose your builder wisely

Just the same as you need to carefully choose your building materials, you’ll also need to thoughtfully pick a builder. It is highly recommended by the Sierra Club that you choose a builder who is LEED certified by the US Green Building Council. When you hire this type of contractor, you can rest assured that he or she will have the advanced knowledge that it takes to build your patio according to eco-friendly practices.

Decorate and accessorize

Decorating your outdoor patio area in an eco-friendly manner isn’t as difficult as you think. Take for example removal wallpaper murals. These types of paintings don’t require paste or glue, making them extremely auspicious to mother nature.

When it comes to outdoor furniture for your patio, once again you’ll want to choose pieces that are manufactured using sustainable materials, such as bamboo. You should also strive to add liveliness to your outdoor area for nighttime entertainment by using solar-powered accent lighting fixtures.

Lanscaping around your patio area

You’ll need to give a lot of thought into the landscaping that you place around your patio. You’ll of course want this area to promote serenity and joy, all the while using plants, shrubs and trees that are native to area.

What’s the importance of native plants? For starters, these plants will be grown locally in your area, meaning they’ll be much more likely to survive in your backyard. Also, since they are native to your area, they will require less water to stay alive, which can do wonders for your water bill.

If you’re unsure as to the plants that are native to your community, a local agricultural extension can provide you with lots of valuable information.

The Takeaway

Building and decorating your outdoor areas doesn’t have to cost an arm and a leg. And best of all, with a bit of effort, you can construct and accessorize your outdoor areas, including your patio, by being environmentally friendly.

Categories
Lawn & Garden Uncategorized

A Quick Guide to Natural Soil Amendments

Good gardens begin with great soil. While soil testing and appropriate fertilizer application go a long way to help plants flourish and produce a bountiful harvest, it isn’t always enough to only worry about nutrient levels. Great soil is fluffy, resists compaction, and lets water drain away at just the right pace to prevent wet roots or thirsty plants. If your soil is heavy and hard or too light and loose, adding the right organic amendments will improve its texture and the health of the plants growing in it.

Compost

Homemade compost is an ideal soil amendment. It’s locally produced to reduce your buying footprint, contains a rich blend of nutrients, and features bacteria your plants need to process those nutrients. A spinning bin can help you make compost in as little as three months out of food scraps and yard trimmings.

Leaf Mold

When leaves in the forest break down, they form a rich black mixture known as leaf mold. This blend creates pockets in the soil that let air and water through. If you have thick clay that acts like concrete after a rainstorm, a few giant piles of leaf mold can make an immediate difference in the texture. It’s also great for sandy soils because the particles act like tiny sponges to hold water where plant roots need it the most. Heavy duty black leaf bags allow you to turn your raked up piles into the decomposed format in one summer, or you can find it at most garden centers.

Aged Manure

Fresh manure is a no-no in the garden because nutrient levels are so high they hurt plants. Once that manure gets a chance to age and compost, it becomes a fertilizer and soil amendment all in one. Keep in mind that it acts as a nitrogen source for plants, so cut back on any other source of the nutrient when you add it to the soil.

Decomposed Materials

Finally, don’t forget about decomposed sawdust, straw, and wood chips. These materials suck nitrogen out of the soil when fresh, but become inert and ideal for loosening the soil after half a year or so of aging. The materials should crumble when rolled in the hand or you risk depleting your garden during the growing season. They all act similarly to leaf mold, but are often easier to find for free.

Categories
Green Building Recycling Uncategorized

How To Make S’Mores And Memories With Your Old Washer And Dryer

Is it time to replace your old, beat-up washer and dryer? Don’t drag them to the curb just yet. All it takes is a little creativity and elbow grease to transform them into something entirely different from their intended use. In fact, that old, beat-up washing machine and the dryer that no longer gets hot will soon become the focus of your next backyard get together. With these easy instructions, you can transform the washer to a fire pit and the dryer to a beverage cooler.

From Washing Clothes to Making S’mores

Have you have dreamed of sitting around a backyard fire pit, roasting marshmallows, eating S’mores and making family memories? Good news, the metal drum of your old washing machine can make that dream come true. Follow these four simple steps and you can start making memories this weekend.

  • Remove the metal drum from the washing machine.
  • Remove any rubber or plastic pieces attached to the drum.
  • Using a wire brush and warm soapy water, scrub off all the soap scum and rust.
  • Paint the drum with a high heat-resistant spray paint, such as Rustoleum.

The fire pit can be used as a portable unit or installed in a decorative stone surround. To make the fire pit portable, simply bolt three metal casters to the bottom of the tub. For a more decorative, permanently placed pit:

  • Clear an area in the yard that measures about 3 feet by 3 feet.
  • Place the tub in the center of the cleared space and place decorative stone about 2-inches deep around the tub.
  • To contain the stones, sink bricks in the ground to create a perimeter around the fire pit area.

 From Dryer to Beverage Cooler

The only thing more perfect than a backyard fire pit is sipping on a cold beverage while you’re roasting marshmallows. The basket of the dryer is the ideal size for a beverage cooler and the holes allow the water from the ice to drain. Simply remove the basket from the dryer, clean with warm soapy water, fill with ice and your favorite beverage.

What to do With Leftover Parts-
Once you have removed the tub from the washer and the dryer, separate the remaining parts. Take the metal housing from both appliances to a metal recycling plant where you can sell it for scrap metal. Appliance repair shops often need difficult to find parts for older machines, which means you could sell your extra parts to them. Check with your county about how to correctly dispose of any left over wiring and other unusable parts from your old appliances.

Want to turn your fire pit into a grill? Visit your local appliance repair shop to search for inexpensive metal grates from old ovens or refrigerators. Clean the grate and place it over the fire pit and you instantly have a unique, one-of-a-kind grill.

~Rene W.

Categories
Eco Tips Lawn & Garden

Growing, Using, and Preserving Fresh Herbs

When a recipe calls for dill, oregano, or basil, many cooks reach for a jar of commercially prepared, dried herbs in the pantry. However, to have the freshest, most delicious flavors, experienced cooks know that there is no substitute for fresh herbs. However, most home cooks use a wide variety of herbs, and buying them all from the supermarket could get expensive very quickly. One solution to fresh herb flavor without the expense is to grow your own herbs at home.

Growing Herbs

Thankfully, most herbs are simple to grow at home. A sunny spot and some average soil are all that are needed, along with a little effort. Basil, oregano, dill, parsley, cilantro, and mint are among the simplest herbs to grow. Start small the very first year so that you will not get overwhelmed.

Many herbs grow well from seeds, and this is an inexpensive way to get started. Basil, parsley, thyme, cilantro, and dill are good candidates for starting from seeds. However, perennial herbs like rosemary, chives, and fennel are slower growing. You will probably be happier with them if you buy them in small pots, already started.

Plant your herbs in a well-drained spot that gets six to eight hours of sunlight daily. Water them when the ground gets dry and pull weeds that pop up. Pay attention to the tags that come with the plants and space them appropriately.

Harvesting Herbs

When your herbs have established themselves, you can start snipping bits of the foliage for recipes. The peak of flavor is achieved right before the plants flower. You can prolong this period by snipping off the flower buds before they open. Never harvest more than one-third of the plant at once to avoid weakening the plant. Harvest the leaves from the outermost part of the plant, allowing the inner leaves to grow.

Storing and Preserving Herbs

If you have plenty of a particular herb, you can store the stems for about a week in a glass jar full of water in the refrigerator. Loosely cover the jar with a plastic bag to keep them fresh. Alternately, you can freeze fresh herbs and store them in zip-top baggies in the freezer. They will still be useful for flavoring but won’t be very good for garnishing. Last, herbs can be dried in a dehydrator or an oven on low heat. After drying, crumble the herbs and store them in jars with tightly-fitting lids.

~April F.

Categories
Featured Lawn & Garden

How to Make Soda Bottle Greenhouses

After you have grown your own veggies for a few years, you may be tempted to start your own seedlings. After all, a packet of vegetable seeds is much less expensive than a six-pack of vegetable seedlings, and you will get 25 or 30 seeds in each packet. Starting seedlings in peat pellets on a windowsill is fairly easy. However, if you don’t have a grow light, your seedlings will quickly become leggy. Most windowsills just do not have enough sunlight for a growing seedling, but the seedlings may not be quite ready for the outdoors. The weather of early spring can be notoriously fickle, and seedlings can freeze on an unexpectedly cold night or become damaged by an unexpected hailstorm.

Soda bottle greenhouses can help your seedlings grow tall and strong by allowing them to be outdoors with plentiful sunlight. However, they also provide protection from unexpected cold snaps and harsh spring storms. Additionally, they are an eco-friendly way of reusing trash that would end up in a landfill.

To make soda bottle greenhouses, you will need one empty soda bottle for each seedling, a craft knife, and potting soil. You can start your seedlings in peat pellets on your windowsill. Alternately, you can directly plant the seeds in the soda bottle greenhouse.

To make the greenhouse, first remove the label from the soda bottle and rinse any soda residue from the inside of the bottle. This sticky juice could attract ants; the ants will not damage your plants but will definitely be annoying.

Using the craft knife, pierce the bottom of the soda bottle to create a small drainage hole. Next, about halfway up the bottle, cut around the circumference of the bottle. Do not cut all the way around. You probably just need to cut about 85 percent of the way around the soda bottle. You can then fold back the top half of the bottle.

Fill the bottom half of the bottle with high-quality potting soil. Dampen the soil by pouring water into the dirt until it comes out of the drainage hole at the bottom of the bottle. Next, plant your seedling or seeds in the dirt.

Carefully move the top of the bottle back over the top of the seedling. Do not allow the plant’s leaves to become pinched in the plastic. Set your soda bottles outdoors in a sunny area. The soda bottle will protect the plant from cold weather and bad storms. You can leave the top of the bottle on if cold weather is an issue. However, if it gets hot, you will want to remove the lid to allow for ventilation and airflow. When the garden spot is ready and the last frost date for your area has passed, cut away the top of the soda bottle and plant your seedlings in the garden.

~April F.

Categories
Featured Lawn & Garden

Gardening With Nature–Companion Planting

Planning your garden to include a very diverse mix of plants can do more than just add interest to it. If you plant certain types of flowers, herbs, and vegetables together, they will actually enhance the productivity of your garden. Planning a garden so that particular plants are located in proximity to one another is called companion planting. Companion plants repel pests, attract beneficial insects, and enhance the growth and flavor of one another.

Here are some tips for companion planting, so you can make the most of your garden this summer.

1. Basil is a friend to all

Basil is a friend to almost all garden plants. This aromatic herb repels flies, mosquitoes, and thrips. Basil does especially well near oregano, peppers, and tomatoes. Rather than planting long rows of only tomatoes and peppers, plant your rows with peppers, tomatoes, and basil together.

2. Corn loves beans.

Beans are legumes, which mean that they take nitrogen from the air and put it in the dirt. Since corn feeds heavily on nitrogen, plant beans where the corn was grown last year, and the corn where the beans were grown.

3. Garlic and roses make quite a pair.

If you plant garlic near your roses, the garlic will repel aphids and Japanese beetles. In fact, any plant, including fruit trees, that is plagued by Japanese beetles, will be benefited by garlic. Scientists have found that plants’ roots actually take up secretions by the garlic plants and release them through the plants’ pores.

4. Marigold makes sense for all.

Marigold benefits many plants in the garden because the roots of these lovely flowers kill damaging nematodes that may live in the soil. Additionally, the flowers of this plant repel whiteflies and tomato hornworms. The Mexican variety of marigold is rumored to repel rabbits and Mexican bean beetles.

5. Dill can do it!

Dill improves the flavor and production of cabbages, cucumbers, and lettuces. However, it does attract the tomato hornworm, so you shouldn’t plant dill near tomatoes. Dill can repel squash bugs, so you may want to put a few plants in your hills of squash and pumpkins. Dill flowers attract beneficial bugs like predatory wasps to your garden, and the plant is a food source for the larvae of swallowtail butterflies.

6. Lettuces love lots of plants.

Lettuces pair well with beans, beets, broccoli, carrots, and onions. You can also plant lettuces in the shade of tall sunflowers, since lettuce plants do not do well in the blazing heat of summer.

Companion planting can help you avoid using toxic chemicals in the garden by attracting beneficial insects and discouraging invasions of pesky insects that will damage your plants. This planting style works with nature to bring more food to your table and more beauty to your garden.

~April F. 

Categories
Eco Tips Featured Lawn & Garden

Why Ladybugs Are Great Garden Guests

With spring planting underway there are some major benefits to having bugs in your garden. That’s right you read it right, we said it is a good thing. Of course some insects are worse than others and some are better than others, however a good insect to have in your garden is the ladybug.

Ladybugs are small beetles that are about ¼ inch in length and are normally red or orange in color with black dots on their shells. Ladybugs can become a nuisance when they attempt to move indoors, however overall these bugs are good for your garden and the environment.

Here are three benefits to having ladybugs in your garden:

Reduce the insect population

Ladybugs are known predatory beetles that eat a very large amount of aphids. Aphids are plant lice and are bad news for your plants. However ladybugs can consume up to 5,000 aphids in their lifetime (about 30-40 a day).

Eliminate your use of pesticides

Since ladybugs eat many of the insects which cause damage to garden plants, a good population of ladybugs will make it unnecessary to use harmful pesticides. It can be a little difficult to get a large population to come to populate your garden but with a few at home gardening tricks (mixing wheat and yeast together and spraying on plants), will help attract lady bugs to your garden.

Make your garden BEAUTIFUL

Ladybugs are beautiful beetles. They are a gorgeous deep color that will add contrast and beauty to your garden. Ladybugs are a lot prettier to look at when compared to worms or slugs.

Sources: steamboattoday.com, (http://www.steamboattoday.com/news/2013/mar/17/deb-babcock-benefits-lady-bugs/)