Categories
Eco Tips Featured Lawn & Garden

3 Green Fertilizer Alternatives

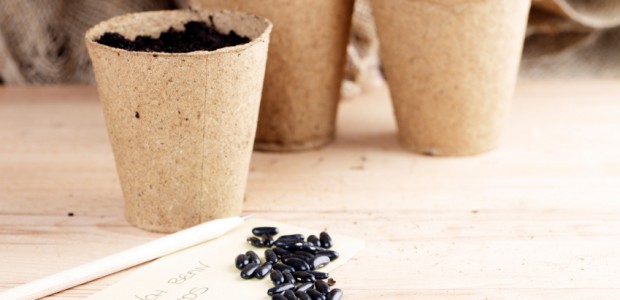
Unfortunately many gardeners rely on chemical fertilizers to grow their trees, grass, flowers, fruits and vegetables. However in recent years there has been an increase in awareness about the amount of chemicals we use in our yards and how it can negatively impact the environment and our friends and family in the long run.

Thankfully with the “green” movement there has been an increase in number of healthy, natural and organic fertilizers.  Here are 3 natural garden fertilizer alternatives to chemical fertilizers.
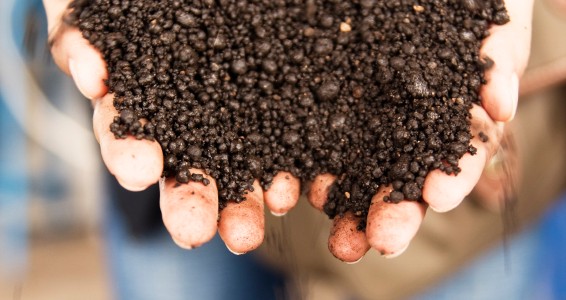
Bat Guano

Bat guano is the ultimate 100 percent natural fertilizer. It comes straight from the butts of bats, into your yard or garden. Farmers and gardeners have used bat guano as a fertilizer for hundreds of years. It wasn’t until recently that inorganic fertilizers have become popular enough for people to forget that there is a natural option that works just as well! The manufacturers of this product state that they follow the high standards of Bat Conservation International, so you can feel good about buying this natural garden and bat-friendly fertilizer.  Bat Guano works great as a soil builder and fertilizer.

Fish Meal Organic Fertilizer

Like bat guano, fish meal is a natural organic fertilizer that was traditionally used by gardeners and farmers before the advent of inorganic fertilizers. Fish meal contains important trace elements, which makes it a complete plant food. Fish meal works quickly and provides plenty of phosphorous and organic nitrogen.

Kelp Meal Fertilizer

Kelp meal fertilizer is made from brown seaweed harvested from cold ocean waters. Once harvested, the kelp is dried and ground up to produce an excellent organic fertilizer. The dried kelp maintains a high content of plant growth hormones, essential minerals and organic material. An added benefit is that kelp meal provides a slow, sustained release of nutrients. Organic kelp fertilizers are fully approved for organic gardening. They work great for flowers, trees, and your lawn.

Sources: sustainablog.com, (http://sustainablog.org/2008/05/low-impact-living-twelve-tips-for-eco-friendly-lawn-care/), extremelygreen.com, (http://www.extremelygreen.com/fertilizerguide.cfm).

Categories
Featured Lawn & Garden

How to Make Your Own Biodegradable Pots

 For many years, the primary packing system for seedlings, are plastic packs of four to twelve containers. The plastic is petroleum based in makeup and automatically makes them a disposable, but not biodegradable product. Nor are they the best way to guarantee that all the plants you purchase would survive and grow. Despite drainage holes, these containers promote root rot through poor air circulation and often many of the plants in these packs do not survive.

Some manufacturers have started to make biodegradable planting pots. These plant containers such consist of wood fiber and peat moss and no drainage holes are necessary and the pot disintegrates into the soil. These pots not only make gardening easy for you (it is not necessary to remove the plant from the plastic pot and re-transplant) but they are better for the environment. Read on to learn how to make your own biodegradable pots at home.

How to Make Your Own Biodegradable Pots

  • Take a tin can, a small plant-pot, or even the inner cardboard tube from a roll of toilet paper, and, folding one sheet of newspaper in half length-ways, wrap it around the can or pot, leaving enough paper at the bottom so that you can fold or tuck it in to make a floor for your pot.
  • Still holding the newspaper, sit the pot upright and remove the can or tube from inside. Using your fingers, or a pencil, press down the folded paper bottom and tip a little bit of compost in to ensure your new biodegradable pot holds its shape, but keep hold of the outside in case it starts to unravel.
  • Now fold down the top, making sure that you fold over the ends of the paper to stop it springing loose. As soon as it holds, pour in more compost up to a couple of centimeters from the top.
  • Place the pot on a tray and gently moisten the soil. You can crowd lots of other makeshift pots around it for additional support and to help retain moisture.
  • Now you’re ready to plant your seed. Leave the tray on a warm, sunny windowsill and you should start to see little green shoots appearing in a matter of days.
  • As soon as the seedlings are big enough (follow the instructions on the packet), you can start hardening them off by taking them outside for the day, and bringing them in at night for about a week before you plant them out. If the seedlings are going directly into a pot inside, you can move them as soon as they are a few inches tall. Do be aware though that plants do grow very quickly in these early stages and you’ll need a larger pot than you think (especially if you’re growing mint, which tends to spread!).

(Instructions courtesy of pledgingforchange.com)

Categories
Featured Lawn & Garden

10 Surprising Health Benefits of Aloe Vera

Everyone knows that aloe vera is great for cuts, sunburns and even bug bites. However did you know about all of the plant’s benefits? The aloe vera plant has been nicknamed the “Healing Plant” and there is good reason too! Not only is the aloe plant great for you and your family but it is a very easy plant to keep alive as well; it is a succulent so it doesn’t require a lot of sun and water.  Growing an aloe plant might be one of the best things you could do for you and your family. Here are some health benefits you may or may not have known about aloe vera:

  • Aloe vera is one of the only known natural vegetarian sources of Vitamin B12, and it contains many minerals vital to the growth process and healthy function of all the body’s systems.
  • Aloe vera plants are also helpful in curing blisters, insect bites and any allergic reactions, eczema, burns, inflammations, wounds, psoriasis. It is great for people who have sensitive skin.
  • It is used as an anti-inflammatory and may be taken internally as a remedy for certain digestive complaints.
  • Oxygenates blood and energizes cells, hydrates skin and repairs skin tissue
  • Aloe vera juice helps in strengthens gums and promotes strong and healthy teeth.
  • An excellent internal tonic for energy and well-being Aloe juice may add greatly to the strength of the food fed, digestive tract, skin, and overall good health and happiness.
  • Aloe vera juice can be applied directly to the skin through gels, creams and lotions to cure acne.
  • Aloe vera plant has vitamins including: Vitamins A, B1, B2, B6, B12, C and E, Folic Acid and Niacin. Drinking a daily dose of Aloe Vera Juice can enhance body defense system against any kind of oxidative stress.
  • As Aloe Vera is a cellular regenerator and has anti-bacterial and anti-fungal effects, these properties make aloe vera one of nature’s healthiest products. Being a strong antioxidant, it hunts down free radicals and protects the body.
  • Aloe vera plant has been found to be favorable in the treatment of diabetes; it lowers glucose levels in the blood.
Categories
Featured Lawn & Garden

7 Steps to Creating a Butterfly Garden

A butterfly garden is a fun way to get you and your children excited about gardening. Not only is a great educational tool (learning about the life cycles) and good for the environment, but it also is a sight for sore eyes. Here is a quick start guide to creating your very own butterfly garden!

1. Research. As with any major project you have to research and make sure a butterfly garden will work in your area. A good way to do this is by simply observing your surrounding areas and watching to see what plants the butterflies are attracted to. Try to select plants native to your area for each growing season.

2. Plan your Garden. Deciding where you want to plant your garden can be a difficult task. Make sure to plant your garden in a sunny spot and keep in mind if the area has some gusty winds as well as hard rain. If your area has those kinds of conditions put up a barrier to help protect your plants (and your hard work)!

3. Choose “Host Plants”.  Note from your research what the caterpillar (larvae) of the local butterflies eat. Host plants are very important when creating your garden because they not only provide a site for the butterfly to lay eggs but are also a food source for the caterpillars. Depending on the type of local butterflies you have will determine the host plants you should plant. Also be prepared for heavy munching on your host plants!

4. Choose “Nectar Plants”. Nectar plants serve as the food source for the butterfly so it is important to choose plants that will bloom throughout the season (especially mid to late summer) because that is when most butterflies are active. Flowers that have multiple florets and produce a lot of nectar are ideal. Some popular plants chosen are the Butterfly Bush and the Butterfly Weed but make sure to do your research to find what works best in your area.

5. Purchase plants or seeds. You can also get these plants and seeds online. Choose robust and healthy plants to give them a good start.

6. Plant. Make sure to keep new plants and seeds watered until plants are well-established or seeds germinate. Keep the weeds at bay, to give the plants a good chance.

7. Observe and enjoy. Watch for female butterflies laying eggs on host plants. Keep good records for yourself so you can know what to change for the next year! Most importantly enjoy!

Some additional notes. Like any other garden your butterfly garden will require some upkeep but keep in mind that butterflies do not like pesticides of any sort. You are going to have to keep away pests naturally, such as letting spiders and wasps do their thing or use insecticidal soaps or plant-based oils. Make sure that you leave some weeds for the caterpillars (some weeds are actually their favorite foods)!  If you are short on space you can also create a butterfly garden solely using container plants.

Sources: tlc.com (http://tlc.howstuffworks.com/home/butterfly-garden4.htm)