Categories
Lawn & Garden

8 Eco-Friendly Plants to Garden

plants-gardening-eco-friendly-winter
http://ow.ly/Fu4xP

Whenever someone is decorating their home they always forget about natural air purifiers. Those natural air purifiers are known as plants. Eco-friendly plants are great to garden. They not only make the world a healthier place to live; they also make your home a refreshing place to be in. Then great thing is that a lot of them are indoor plants that can help get rid of air pollutants. They will bring a pop of color to any room along with fresh air. You can even add moisture to your room during the winter months just by adding a plant.

Here are some eco-friendly plants that you should garden.

  1. Tulips remove ammonium from the air.
  2. Peace Lily plants are so beautiful when they are peaceful cleaning the air. The white blooming plant is known to help filter toxic pollutant smells like nail polish, paint, and anything with benzene fumes.
  3. The Feston Rose Plant is not only beautiful but it also smells great. The flowers that bloom are vibrant and the plant can withstand high temperatures. Plus do not be guilty for not watering it much. It can survive. Treat it well thought because it helps tremendously with getting rid of air pollutants.
  4. Gerbera can easily remove toxic vapors from your environment.
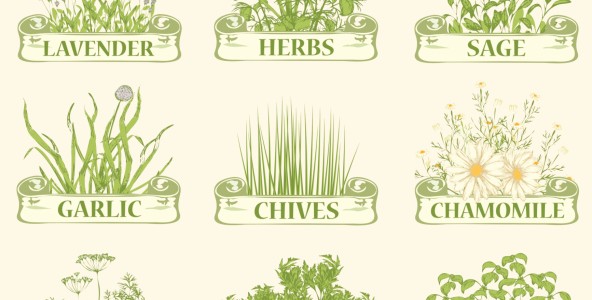
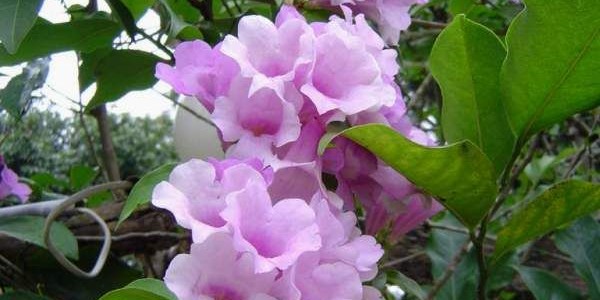
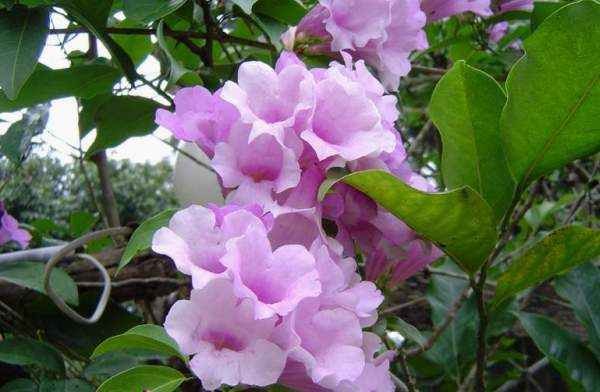
  5. The Garlic Vine is the garlic/onion smelling flower of plants, hence where it gets its name from. Beautiful lavender flowers are what make this such a delightful indoor plant to have. The petals can be used for ailments and the vine is a great purifier.
garlic-vine-eco-friendly-plant
http://ow.ly/Fu2Dg
  1. The Devil’s Ivy is a devil of a plant because it somehow continues to grow and grow with little care. Hang it high because it grows rapidly. The plant is great as a natural anti-pollutant against carbon monoxide.
  2. Phalaenopsis plants are hard to pronounce but are pretty to look at. The purify areas in your house that are not close to natural sunlight. Why? Since they cannot take a lot of sun light you can put them in areas with little light.
  3. Mini Palm Trees are great to keep indoors. Trees take in the carbon dioxide in the air and in return release oxygen for us to breathe. I think that is very kind of them. Plus it will give your room a nice tropical feel.

Next time you plan out your new eco-friendly project do not forget about our green friends. No not the aliens. These eco-friendly plants can make your room or garden so beautiful. My favorite is the Yellow Goddess. She is small, yet loudly intoxicating with natural purifiers. Freshen up the air and area at the same time. Learn how to take care of them and they will take care of you.

Categories
Lawn & Garden

Eco-Friendly Winter Lawn Care

lawn-leaves-fall-winter-rake-care
http://goo.gl/KCF4xZ

Winter is coming. No, that does not mean that another season of Game of Thrones is on its way. It means that you need to find out how to take care of your lawn the eco-friendly way. Do not let the cold weather ruin all of your hard work. The green color on your lawn will fade away slowly during the winter, but there are ways to get that color back in the spring.

Here are some basic things you can do to keep your lawn safe in the winter.

Mulch: If your lawn has some patchy areas then spread mulch in those areas. It will keep weeds from growing up in it and also keep the grass around it from being damaged too.

Local Plants: Incorporate some local plants because they have adapted to survive in the weather that hits the area. They will live on through the winter season. Plus they are already accustomed to the local diseases.

Plant Seasonally: Rose bushes, azaleas, and hibiscus are all options of plants that bloom well in the winter.

Mow: Go back to the basics. Forget about the electric lawnmower and the gas powered lawnmower. Use a push mower. You help the world and help yourself in the process. Keep the grass cut short during the winter. By doing this you keep rodents out from ruining the grass.  Also only mow every four weeks.

Rake: The leaves can kill and de-green your lawn. It keeps the grass from getting sunlight and air. Rake them up regularly. Do not get rid of the fallen leaves. Crumble them up to reuse in the spring as mulch. Use a bamboo rake to keep it as eco0friendly as you can.

Weeds Be Gone: Pull the weeds out by hand but be careful to not let any of the seeds hit the soil again.

Grass Seeds: In any area that there is few grass or none at all, plant new grass seeds now. Cover them up with mulch or compost to help them grow faster. In the spring time your grass will be even, just trim it.

Soil: Frequently keep your lawn feed with a good mix of fertilizer. It needs aeration to keep the flow of water and air to hit every spot of the lawn.

Drench It: Before it gets real cold, water your lawn real good. Drench it up so it can have one last good gulp of water before the spring.

Lazy Makes Lawn Unhappy: Do not let your lawn suffer because you are lazy. Be active and protect your lawn in the winter.

Hopefully with the simple tasks you can keep your lawn looking great throughout all the seasons. Taking care of it in the winter will always produce a beautiful green lawn. Rake, mow, water, and plant knowledgeably. Keep up with new eco-friendly lawn care maintenance at your local garden center.

Categories
Articles Lawn & Garden Recycling

Turning Your Backyard Into a Green-Living Haven

No home is complete without a spruced up backyard. Even if this outdoor area is rather small, with the right touch, it can look better than ever before, and more importantly, it can be used as a versatile form of living space. From outdoor kitchens to in-ground swimming pools, there are many ways to make use of a backyard. And best of all, there are many green-friendly techniques you can follow to ensure you turn your backyard into a green-living haven.

Revamp Your Used Furniture

Your current outdoor patio furniture may seem a bit worn out, but by upcycling these pieces, you’ll be well on your way to revamping them into completely new pieces. From adding a fresh coat of paint to replacing the cushions, there are many affordable and eco-friendly methods for sprucing up old furniture and extending its longevity.

Be Cautious with the Way You Plant Flowers and Trees

If your backyard is spotted with plants, flowers and trees that require lots of water, you’ll at least want to group these together. In doing so, it will be easier to water these areas on a more consistent basis than you do other areas of the yard. Not only does this help conserve water, but it will do wonders for your water bill.

Do the Work Yourself

One of the best ways to create a backyard haven in a green-friendly way is by doing the work yourself. From raking the yard to digging holes to planting flowers, when you do things yourself, this allows you to accomplish your tasks in the greenest manners possible. And in addition to taking lots of pride in the end-product, you’ll also save a ton of money by doing the work yourself. Do keep in mind, though, that maintaining your backyard will take lots of work; it will need your attention all year long.

Categories
Articles Lawn & Garden Uncategorized

Getting Your Yard to Look Marvelous In a Budget-Friendly Manner

A large number of homeowners take a great deal of pride in their lawns. If you happen to be one of these people, there’s no need to stress about taking care of your lawn even if you’re on a budget. Let’s take a quick look at a few budget-friendly tips you can follow to keep your lawn looking its best all year long.

Swap out your services

If you have time to mow your own lawn, then by all means you should. If, however, time doesn’t permit, then you’ll need to hire someone to mow it for you. Unfortunately, paying for lawn mowing services can get quite expensive. Think about it, if you hire someone to mow your lawn for $50 a week, that’s still $200 a month, sometimes $250.

To avoid having to pay for lawn care, you could swap out your services. For example, if your lawn care guy has kids, you could offer to babysit one to two days/nights a week in exchange for mowing your lawn. It’s a win-win for everyone.

Make sure your lawn is mowed in the right manner

When mowing your lawn, it’s best to leave the mower blades high. In doing this, the grass will grow deeper roots, which means your grass will not only be thicker but healthier too.

Quit wasting time picking up any clippings

After your lawn gets mowed, it may be tempting to pick up any loose clippings. In all actuality, though, it’s best to leave them sitting as they are because they will eventually start to breakdown, which means they’ll be contributing nitrogen to your lawn and serve as a free form of grass fertilizer.

Plant your own flowers

Instead of paying a landscape specialist thousands of dollars to plant shrubs, trees and flowers, consider doing the work yourself. There are many free, online tutorials that you can use to walk you through all involved planting steps, and best of all, you’ll be able to take much pride in your yard once the work is done.

Water your lawn in the morning

According to Keypointapp, it’s best to water your lawn in the morning. The grass will soak up the water, and any excess water will evaporate before the day ends, meaning it’ll be less likely that fungus will form on your lawn.

Categories
Eco Tips Lawn & Garden Uncategorized

Low-maintenance, low-water: Herb and flower spiral garden

It is a challenge for gardeners in hot climates to maintain a working food or flower garden without using a ton of water. With water shortages prevalent throughout the south, it is important to consider planning your garden with water conservation in mind. Not only will it help the environment, it will preserve the health of your soil and vitality of your crop.

A common problem with over-head watering is the salt that builds up in the dirt from evaporation. When garden water evaporates, it leaves salts and other trace minerals behind which eventually can have negative consequences for the soil, which was one of the main problems during the great depression and the famous dust bowl .

There are a number of steps you can take to assure that minimal water will be wasted, while getting a maximum yield from your crop whether that is flowers or food.

A great way to conserve water is through the manipulation of the garden plot. To build a low water herb spiral, you’ll want to dig a bowl-shaped hole in the desired location. Pick an area of yard with adequate sunshine for a good portion of the day.

  • Dig the circle down about a foot deep and about three feet in diameter. You’ll want to have enough room for all of the herbs or flowers you plan to sow, making sure to leave at least 6 inches between each plant, also accounting for the width of that plant.
  • Layer about 4″ of gravel on the bottom, building a rock spiral off of that foundation. Fill the remaining structure with good quality potting soil. The gravel will hold the water at the bottom, keeping the soil at a regular moisture level without over-saturating.

This and other techniques can be utilized to conserve water without a bunch of consistent hassle. Just dig the spiral, lay the gravel, do some initial watering sufficient for transplanting, and watch it grow. This low maintenance herb spiral will last a long time, and collect rain water without any help from you. Happy gardening!

Categories
Eco Tips Lawn & Garden Uncategorized

Building and Decorating Your Patio In an Eco-Friendly Way

There’s something about the outdoors that makes people want to live a greener life. And this especially rings true for outdoor patio areas. Fortunately, there are many ways to build and transform patios into some of nature’s best friends.

Choose your construction materials wisely

It’s of the utmost importance to construct your patio areas using sustainable building materials. Some of the more eco-friendly materials to choose from include:

  • Reclaimed brick
  • Recycled stone pavers
  • Natural stone
  • Locally produced bricks
  • Responsibly harvested wood

Choose your builder wisely

Just the same as you need to carefully choose your building materials, you’ll also need to thoughtfully pick a builder. It is highly recommended by the Sierra Club that you choose a builder who is LEED certified by the US Green Building Council. When you hire this type of contractor, you can rest assured that he or she will have the advanced knowledge that it takes to build your patio according to eco-friendly practices.

Decorate and accessorize

Decorating your outdoor patio area in an eco-friendly manner isn’t as difficult as you think. Take for example removal wallpaper murals. These types of paintings don’t require paste or glue, making them extremely auspicious to mother nature.

When it comes to outdoor furniture for your patio, once again you’ll want to choose pieces that are manufactured using sustainable materials, such as bamboo. You should also strive to add liveliness to your outdoor area for nighttime entertainment by using solar-powered accent lighting fixtures.

Lanscaping around your patio area

You’ll need to give a lot of thought into the landscaping that you place around your patio. You’ll of course want this area to promote serenity and joy, all the while using plants, shrubs and trees that are native to area.

What’s the importance of native plants? For starters, these plants will be grown locally in your area, meaning they’ll be much more likely to survive in your backyard. Also, since they are native to your area, they will require less water to stay alive, which can do wonders for your water bill.

If you’re unsure as to the plants that are native to your community, a local agricultural extension can provide you with lots of valuable information.

The Takeaway

Building and decorating your outdoor areas doesn’t have to cost an arm and a leg. And best of all, with a bit of effort, you can construct and accessorize your outdoor areas, including your patio, by being environmentally friendly.

Categories
Lawn & Garden Uncategorized

A Quick Guide to Natural Soil Amendments

Good gardens begin with great soil. While soil testing and appropriate fertilizer application go a long way to help plants flourish and produce a bountiful harvest, it isn’t always enough to only worry about nutrient levels. Great soil is fluffy, resists compaction, and lets water drain away at just the right pace to prevent wet roots or thirsty plants. If your soil is heavy and hard or too light and loose, adding the right organic amendments will improve its texture and the health of the plants growing in it.

Compost

Homemade compost is an ideal soil amendment. It’s locally produced to reduce your buying footprint, contains a rich blend of nutrients, and features bacteria your plants need to process those nutrients. A spinning bin can help you make compost in as little as three months out of food scraps and yard trimmings.

Leaf Mold

When leaves in the forest break down, they form a rich black mixture known as leaf mold. This blend creates pockets in the soil that let air and water through. If you have thick clay that acts like concrete after a rainstorm, a few giant piles of leaf mold can make an immediate difference in the texture. It’s also great for sandy soils because the particles act like tiny sponges to hold water where plant roots need it the most. Heavy duty black leaf bags allow you to turn your raked up piles into the decomposed format in one summer, or you can find it at most garden centers.

Aged Manure

Fresh manure is a no-no in the garden because nutrient levels are so high they hurt plants. Once that manure gets a chance to age and compost, it becomes a fertilizer and soil amendment all in one. Keep in mind that it acts as a nitrogen source for plants, so cut back on any other source of the nutrient when you add it to the soil.

Decomposed Materials

Finally, don’t forget about decomposed sawdust, straw, and wood chips. These materials suck nitrogen out of the soil when fresh, but become inert and ideal for loosening the soil after half a year or so of aging. The materials should crumble when rolled in the hand or you risk depleting your garden during the growing season. They all act similarly to leaf mold, but are often easier to find for free.

Categories
Lawn & Garden

Keep Your Garden Healthy: Tips for Natural Ways to Prevent Pests and Common Plant Diseases

After spending hours tilling and planting the garden, the last thing you want is for all of your plants to become pest infested and/or covered in fungus or powdery mildew. Applying pesticides will add harmful chemicals to your crops, the soil and future plantings as well as effect the flavor of your fruits and vegetables. There are a range of safe and natural things you can do to keep your current and future garden healthy.

Start With the Soil

The soil is the first place to begin controlling disease and insects in an organic garden. Using soil that is full of organic nutrients and matter will help your plants thrive and produce a healthy, productive crop. Insects and diseases thrive off of injured and weak plants, but when they are strong and healthy, garden plants have an ability to change their chemistry naturally in order to defend against its enemies. Things you can do to strengthen the soil include:

  • Adding compost materials to the soil before planting. Items such as egg shells will provide natural nutrients to the soil.
  • Always mulch the surface of the garden to help suppress weeds, protect soil erosion, increase earthworm activity and prevent slugs and snails from taking over. Leaves, straw, pine needles and grass clippings make excellent mulch for a garden.

Prevent Fungus 

The best way to fight fungus in the garden is by using natural items you probably already have in the kitchen. These simple remedies will help to safely and naturally keep out common problems, such as fungus and disease.

  • Apple cider vinegar is excellent for treating a range of plant diseases, such as black spots and powdery mildew. In a spray bottle, mix 3 tablespoons of apple cider vinegar with 2 quarts of water. Spray the infected plants with the solution when the temperatures are the coolest, such as in the morning or early evening. Avoid spraying the plants when there is direct sunlight on them and repeat daily until the condition is cured.
  • Milk is an ideal virus and fungus fighter for the garden. To prevent fungus, simply sprinkle a few tablespoons of powdered milk in the soil before planting. If you notice fungus on the leaves of plants, spray a mixture of equal parts of milk and water (1-cup milk and 1-cup water) directly on the infected leaves.
  • Baking soda is an excellent treatment for plant fungus. In a spray bottle, mix 1 tablespoon vegetable oil, a few drops of liquid, biodegradable dish-washing liquid and 1 tablespoon of baking soda. Spray the infected plants, including the base of the plant and the underside of leaves.

To help keep your garden healthy year after year, it is important to rotate the crops. Avoid overwatering plants, especially if you are noticing fungus or mildew. An excellent way to improve the health of your garden as well as try new garden foods, is with companion planting. Companion planting simply means arranging plants that are beneficial for each other. For example, planting a strong smelling herb near the vegetables will prevent insects from smelling the vegetable plants.

~Rene W.

Categories
Eco Tips Lawn & Garden

Growing, Using, and Preserving Fresh Herbs

When a recipe calls for dill, oregano, or basil, many cooks reach for a jar of commercially prepared, dried herbs in the pantry. However, to have the freshest, most delicious flavors, experienced cooks know that there is no substitute for fresh herbs. However, most home cooks use a wide variety of herbs, and buying them all from the supermarket could get expensive very quickly. One solution to fresh herb flavor without the expense is to grow your own herbs at home.

Growing Herbs

Thankfully, most herbs are simple to grow at home. A sunny spot and some average soil are all that are needed, along with a little effort. Basil, oregano, dill, parsley, cilantro, and mint are among the simplest herbs to grow. Start small the very first year so that you will not get overwhelmed.

Many herbs grow well from seeds, and this is an inexpensive way to get started. Basil, parsley, thyme, cilantro, and dill are good candidates for starting from seeds. However, perennial herbs like rosemary, chives, and fennel are slower growing. You will probably be happier with them if you buy them in small pots, already started.

Plant your herbs in a well-drained spot that gets six to eight hours of sunlight daily. Water them when the ground gets dry and pull weeds that pop up. Pay attention to the tags that come with the plants and space them appropriately.

Harvesting Herbs

When your herbs have established themselves, you can start snipping bits of the foliage for recipes. The peak of flavor is achieved right before the plants flower. You can prolong this period by snipping off the flower buds before they open. Never harvest more than one-third of the plant at once to avoid weakening the plant. Harvest the leaves from the outermost part of the plant, allowing the inner leaves to grow.

Storing and Preserving Herbs

If you have plenty of a particular herb, you can store the stems for about a week in a glass jar full of water in the refrigerator. Loosely cover the jar with a plastic bag to keep them fresh. Alternately, you can freeze fresh herbs and store them in zip-top baggies in the freezer. They will still be useful for flavoring but won’t be very good for garnishing. Last, herbs can be dried in a dehydrator or an oven on low heat. After drying, crumble the herbs and store them in jars with tightly-fitting lids.

~April F.

Categories
Featured Lawn & Garden

How to Make Soda Bottle Greenhouses

After you have grown your own veggies for a few years, you may be tempted to start your own seedlings. After all, a packet of vegetable seeds is much less expensive than a six-pack of vegetable seedlings, and you will get 25 or 30 seeds in each packet. Starting seedlings in peat pellets on a windowsill is fairly easy. However, if you don’t have a grow light, your seedlings will quickly become leggy. Most windowsills just do not have enough sunlight for a growing seedling, but the seedlings may not be quite ready for the outdoors. The weather of early spring can be notoriously fickle, and seedlings can freeze on an unexpectedly cold night or become damaged by an unexpected hailstorm.

Soda bottle greenhouses can help your seedlings grow tall and strong by allowing them to be outdoors with plentiful sunlight. However, they also provide protection from unexpected cold snaps and harsh spring storms. Additionally, they are an eco-friendly way of reusing trash that would end up in a landfill.

To make soda bottle greenhouses, you will need one empty soda bottle for each seedling, a craft knife, and potting soil. You can start your seedlings in peat pellets on your windowsill. Alternately, you can directly plant the seeds in the soda bottle greenhouse.

To make the greenhouse, first remove the label from the soda bottle and rinse any soda residue from the inside of the bottle. This sticky juice could attract ants; the ants will not damage your plants but will definitely be annoying.

Using the craft knife, pierce the bottom of the soda bottle to create a small drainage hole. Next, about halfway up the bottle, cut around the circumference of the bottle. Do not cut all the way around. You probably just need to cut about 85 percent of the way around the soda bottle. You can then fold back the top half of the bottle.

Fill the bottom half of the bottle with high-quality potting soil. Dampen the soil by pouring water into the dirt until it comes out of the drainage hole at the bottom of the bottle. Next, plant your seedling or seeds in the dirt.

Carefully move the top of the bottle back over the top of the seedling. Do not allow the plant’s leaves to become pinched in the plastic. Set your soda bottles outdoors in a sunny area. The soda bottle will protect the plant from cold weather and bad storms. You can leave the top of the bottle on if cold weather is an issue. However, if it gets hot, you will want to remove the lid to allow for ventilation and airflow. When the garden spot is ready and the last frost date for your area has passed, cut away the top of the soda bottle and plant your seedlings in the garden.

~April F.