Categories
Featured Lawn & Garden

Gardening With Nature–Companion Planting

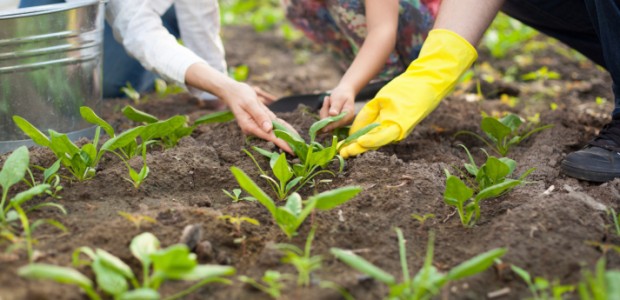
Planning your garden to include a very diverse mix of plants can do more than just add interest to it. If you plant certain types of flowers, herbs, and vegetables together, they will actually enhance the productivity of your garden. Planning a garden so that particular plants are located in proximity to one another is called companion planting. Companion plants repel pests, attract beneficial insects, and enhance the growth and flavor of one another.

Here are some tips for companion planting, so you can make the most of your garden this summer.

1. Basil is a friend to all

Basil is a friend to almost all garden plants. This aromatic herb repels flies, mosquitoes, and thrips. Basil does especially well near oregano, peppers, and tomatoes. Rather than planting long rows of only tomatoes and peppers, plant your rows with peppers, tomatoes, and basil together.

2. Corn loves beans.

Beans are legumes, which mean that they take nitrogen from the air and put it in the dirt. Since corn feeds heavily on nitrogen, plant beans where the corn was grown last year, and the corn where the beans were grown.

3. Garlic and roses make quite a pair.

If you plant garlic near your roses, the garlic will repel aphids and Japanese beetles. In fact, any plant, including fruit trees, that is plagued by Japanese beetles, will be benefited by garlic. Scientists have found that plants’ roots actually take up secretions by the garlic plants and release them through the plants’ pores.

4. Marigold makes sense for all.

Marigold benefits many plants in the garden because the roots of these lovely flowers kill damaging nematodes that may live in the soil. Additionally, the flowers of this plant repel whiteflies and tomato hornworms. The Mexican variety of marigold is rumored to repel rabbits and Mexican bean beetles.

5. Dill can do it!

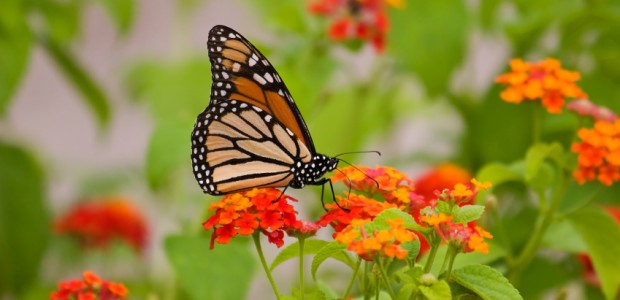
Dill improves the flavor and production of cabbages, cucumbers, and lettuces. However, it does attract the tomato hornworm, so you shouldn’t plant dill near tomatoes. Dill can repel squash bugs, so you may want to put a few plants in your hills of squash and pumpkins. Dill flowers attract beneficial bugs like predatory wasps to your garden, and the plant is a food source for the larvae of swallowtail butterflies.

6. Lettuces love lots of plants.

Lettuces pair well with beans, beets, broccoli, carrots, and onions. You can also plant lettuces in the shade of tall sunflowers, since lettuce plants do not do well in the blazing heat of summer.

Companion planting can help you avoid using toxic chemicals in the garden by attracting beneficial insects and discouraging invasions of pesky insects that will damage your plants. This planting style works with nature to bring more food to your table and more beauty to your garden.

~April F. 

Categories
Lawn & Garden Recycling

3 Simple Steps to Create Your Own Rain Bucket

You have heard the old saying “April showers bring May flowers…” but did you realize you can save on your water bill and the environment just by investing in a rain bucket? A rain bucket can be anything you want it to be. Whether you use an old plastic moving tub, a plastic bucket, or even an old garbage pail, you can use those to collect greywater. A type of grey water is rainfall and while you can’t drink rainwater, your plants can certainly use it! You probably won’t collect enough water to water your plants throughout the entire season but it will certainly help keep the soil moist during the hot summer months.

Make sure to put your rain bucket near downspouts, that way the rain buckets can collect the water that lands on the roof. Your roof normally is the largest surface area so you will be able to collect the most water from these areas (a shed can work too!)

It is really easy to make your own rain bucket it just takes a little time and a trip to Lowes or the Home Depot (you might even have some of the materials in your garage!) For this project you are going to need:

1 – 32 Gallon Vinyl Trash can with Lid (preferably)
1 – 1″ PVC Male Hose Adapter
Drill with 1″ Spade Bit
White Caulking Plumbers tape

Step 1.  Once you have found the location you would like to place your rain bucket, measure and cut the downspout above or near the top of the rain bucket. Normally you would cut off part of the down spout so the end sits a little higher than your bucket. Cut a hole in the shape of the downspout near the top of the bucket. You can also cut an overflow hole about the same size on the other side to allow excess water to escape when it’s full.

Step 2. Next, drill a 1″ hole about 3-4 inches from the bottom of the rain barrel. Using some common plumbers tape, wrap the threads of the adapter to keep water from leaking through the hole. Screw adapter from the inside so the threads are exposed to the outside of the Rain.

Step 3. Insert the downspout pipe from the roof into the rain bucket and attach the overflow to the other side. Attach a garden hose to the bottom adapter and caulk around the gaps to ensure the unit is sealed. This is important as mosquitoes would love to nest in your rain barrel (if you don’t have a top for your rain bucket buy mesh netting.) Once everything is connected, fill with water and test. The pressure from the amount of water contained inside the rain bucket will allow you to water your plants without much difficulty.

You are now ready to sustainably water your flowers and vegetable gardens well into summer!

Sources: ezinearticles.com, (http://ezinearticles.com/?Make-a-Rain-Bucket-in-3-Easy-Steps&id=2441701).


Categories
Eco Tips Featured Lawn & Garden

Why Ladybugs Are Great Garden Guests

With spring planting underway there are some major benefits to having bugs in your garden. That’s right you read it right, we said it is a good thing. Of course some insects are worse than others and some are better than others, however a good insect to have in your garden is the ladybug.

Ladybugs are small beetles that are about ¼ inch in length and are normally red or orange in color with black dots on their shells. Ladybugs can become a nuisance when they attempt to move indoors, however overall these bugs are good for your garden and the environment.

Here are three benefits to having ladybugs in your garden:

Reduce the insect population

Ladybugs are known predatory beetles that eat a very large amount of aphids. Aphids are plant lice and are bad news for your plants. However ladybugs can consume up to 5,000 aphids in their lifetime (about 30-40 a day).

Eliminate your use of pesticides

Since ladybugs eat many of the insects which cause damage to garden plants, a good population of ladybugs will make it unnecessary to use harmful pesticides. It can be a little difficult to get a large population to come to populate your garden but with a few at home gardening tricks (mixing wheat and yeast together and spraying on plants), will help attract lady bugs to your garden.

Make your garden BEAUTIFUL

Ladybugs are beautiful beetles. They are a gorgeous deep color that will add contrast and beauty to your garden. Ladybugs are a lot prettier to look at when compared to worms or slugs.

Sources: steamboattoday.com, (http://www.steamboattoday.com/news/2013/mar/17/deb-babcock-benefits-lady-bugs/)

Categories
Featured Lawn & Garden

7 Steps to Creating a Butterfly Garden

A butterfly garden is a fun way to get you and your children excited about gardening. Not only is a great educational tool (learning about the life cycles) and good for the environment, but it also is a sight for sore eyes. Here is a quick start guide to creating your very own butterfly garden!

1. Research. As with any major project you have to research and make sure a butterfly garden will work in your area. A good way to do this is by simply observing your surrounding areas and watching to see what plants the butterflies are attracted to. Try to select plants native to your area for each growing season.

2. Plan your Garden. Deciding where you want to plant your garden can be a difficult task. Make sure to plant your garden in a sunny spot and keep in mind if the area has some gusty winds as well as hard rain. If your area has those kinds of conditions put up a barrier to help protect your plants (and your hard work)!

3. Choose “Host Plants”.  Note from your research what the caterpillar (larvae) of the local butterflies eat. Host plants are very important when creating your garden because they not only provide a site for the butterfly to lay eggs but are also a food source for the caterpillars. Depending on the type of local butterflies you have will determine the host plants you should plant. Also be prepared for heavy munching on your host plants!

4. Choose “Nectar Plants”. Nectar plants serve as the food source for the butterfly so it is important to choose plants that will bloom throughout the season (especially mid to late summer) because that is when most butterflies are active. Flowers that have multiple florets and produce a lot of nectar are ideal. Some popular plants chosen are the Butterfly Bush and the Butterfly Weed but make sure to do your research to find what works best in your area.

5. Purchase plants or seeds. You can also get these plants and seeds online. Choose robust and healthy plants to give them a good start.

6. Plant. Make sure to keep new plants and seeds watered until plants are well-established or seeds germinate. Keep the weeds at bay, to give the plants a good chance.

7. Observe and enjoy. Watch for female butterflies laying eggs on host plants. Keep good records for yourself so you can know what to change for the next year! Most importantly enjoy!

Some additional notes. Like any other garden your butterfly garden will require some upkeep but keep in mind that butterflies do not like pesticides of any sort. You are going to have to keep away pests naturally, such as letting spiders and wasps do their thing or use insecticidal soaps or plant-based oils. Make sure that you leave some weeds for the caterpillars (some weeds are actually their favorite foods)!  If you are short on space you can also create a butterfly garden solely using container plants.

Sources: tlc.com (http://tlc.howstuffworks.com/home/butterfly-garden4.htm)